4. Basic Data Layer
About this chapter
In this chapter we'll set up a basic data layer, this includes:
- Setting up a PostgreSQL database with Docker
- Introducing the 1st of our domain models - the
Platform - Adding a Db Context act as an intermediary between the DB and
Platformmodel - Set up .NET Configuration
- Generate and apply migrations as part of a code-first EF Core workflow
Learning outcomes
- Understand what Docker is and how it can be used
- Understand how to specify services with Docker Compose
- Understand what domain models are
- Understand the role of the DB Context and how to make use of it
- Understand the core concepts related to the .NET Configuration layer
- Understand the code-first EF Core workflow
- Generate an apply migrations
- Use a DB client to connect to and verify a database
Architecture Checkpoint
In reference to our solution architecture, we'll be working with the highlighted components in this chapter:
- Models (partially complete)
- Db Context (partially complete)
- PostgreSQL DB (fully complete)

- The code for this section can be found here on GitHub
- The complete finished code can be found here on GitHub
PostgreSQL
The first thing we're going to set up is the PostgreSQL database that will be the persistent store for our Platforms and Commands. There are a number of ways to do this, but by far the most straightforward (from my perspective at least) is to use Docker.
Docker is another one of those large subjects that's a perfect candidate for the theory section, so we'll only cover what we need to know here to keep the ball rolling.
The 3 things you need to be aware of are:
- Images: these are templates or blueprints of a particular system: PostgreSQL, Redis, Grafana etc. They are created most usually by the software vendors themselves, and made available on a public image repository like Docker Hub
- Containers: allow images to be "run" as live systems. So you select an image (e.g. PostgreSQL) and run it in a container that can be used by other systems (e.g. our API).
- Docker: is the platform that hosts and runs containers. There are other systems that do the same thing as Docker (e.g. Podman), but Docker is by far the most popular.
In a nutshell we're going to use Docker (or more correctly Docker Desktop) to run the PostgreSQL database. To do that we'll create a Docker Compose file and specify how we want the PostgreSQL database server to be created.
Create an .env file
Before we move on to creating a Docker Compose file, first we'll create 2 new files in the root of the API project:
.env.env.example
The .env file will contain some sensitive information related to how we can login to the PostgreSQL DB, specifically:
- Username
- Password
- Database name
Even though this DB is a development instance running on our local machine, it's good practice to get into the habit of ensuring this type of detail is not committed to Git / GitHub.
Having created both files, open the .gitignore file we created in Chapter 3 and ensure:
- There is an entry for the
.envfile - thus excluding it from version control - There is not an entry for
.env.examplefile - we want this to be included in version control as it will allow users of our project to use this as a template to set up their own.envfile.
A quick look at the .gitignore file confirms both conditions have been met:
# dotenv files
.env
Next populate the .env file as follows, feeling free to use your own username, password and database values (keep the environment variable names as-is):
POSTGRES_USER=postgres
POSTGRES_PASSWORD=pa55w0rd
POSTGRES_DB=commandapi
Save the file then place the following values into the .env.example file:
POSTGRES_USER=postgres
POSTGRES_PASSWORD=your_password_here
POSTGRES_DB=commandapi
You can see this is almost identical to the .env file with the exception of the value for POSTGRES_PASSWORD.
Create a Docker Compose File
In the root of the API project, create a new file called: docker-compose.yml, and enter the following contents:
services:
  postgres:
    image: postgres:16
    container_name: postgres_db
    environment:
      POSTGRES_USER: ${POSTGRES_USER:-postgres}
      POSTGRES_PASSWORD: ${POSTGRES_PASSWORD}
      POSTGRES_DB: ${POSTGRES_DB:-commandapi}
    ports:
      - "5432:5432"
    volumes:
      - postgres_data:/var/lib/postgresql/data
    restart: unless-stopped

volumes:
  postgres_data:
This file specifies:
- 1 Service called
postgres image: this is the image retrieved from Docker Hub - in this casepostgresat version16container_name: this is a name by which the container can be referencedenvironment: these are configuration elements for the PostgreSQL DB:POSTGRES_USER: The user account name we can use to login - this read in from the.envfile, with a default value provided (postgres)POSTGRES_PASSWORD: The password we can use to login - this is read in from the.envfile, there is no default valuePOSTGRES_DB: The name of the database created on the server - this is read in from the.envfile, with a default value provided (commandapi)
ports: This is an external to internal port mapping or ahosttocontainermapping. In this case we'd be able to connect to the container from our host (our development PC) using the standard PostgreSQL port of5432volumes: This is specifying a Docker managed named volume (postgres_data) mapped to a path inside the running container (/var/lib/postgresql/data)restart: Specifies the restart behavior of the container
Save everything, then check that you have Docker Running by typing:
docker ps
This command asks Docker to list any running containers, (no problem if you don't) it just tests that Docker is installed and running.
You should get a response like this:
CONTAINER ID IMAGE COMMAND CREATED STATUS PORTS NAMES
The execute the following to run up an instance of PostgreSQL:
docker compose up -d
This command locates the docker-compose.yml file in the current working directory (you will need to provide a path if it is elsewhere), and executes the instructions therein, spinning up an instance of PostgreSQL. The -d flag denotes detach which means the command prompt is returned back to the user for further use.
If this is the first time you have executed this command, Docker will need to fetch the postgres image from Docker Hub, this will take a minute or 2 depending on your connection.
You should see something similar to the following when the container is up and running:
✔ Container postgres_db Started
You can re-run the docker ps command to see what you get this time.
DBeaver (Optional)
This is an optional step, but one I recommend, and that is to use DBeaver to connect to our PostgreSQL instance to have a look at what's been created.
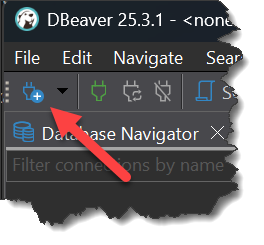
Open DBeaver, and click the Connect to database icon:
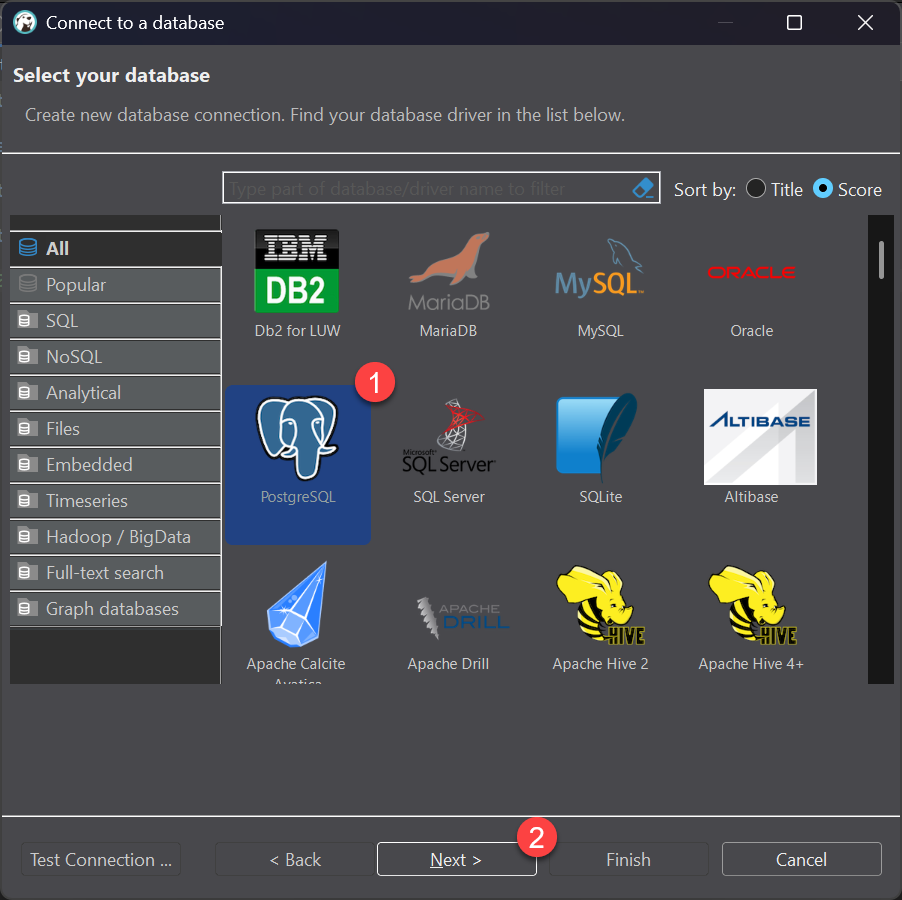
Select PostgreSQL and click Next:
Enter the database name, username and password to match the values in the .env file, then click Test Connection

If this is the first time you've done this, you may be asked to download the client drivers for PostgreSQL, assuming you wnt to connect accept the download.
If the connection is a success you should see the following:
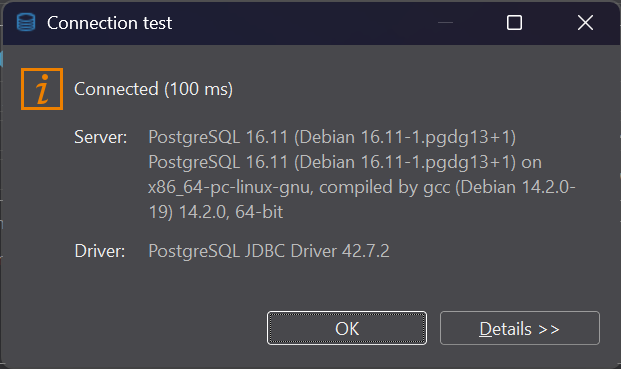
Dismiss the Connection test dialog, and click Finish.
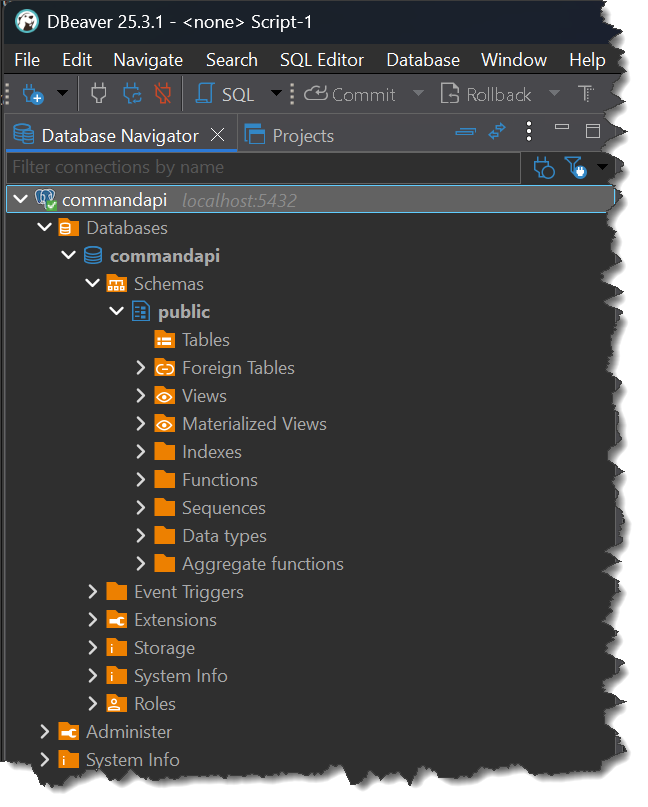
Expand the connection in DBbeaver and you'll see that we have database (commandapi) but no tables as yet...
Platform Model
We're now going to create the Platform model that models our platform entities:
- Create folder in the root of the project called:
Models - Inside that folder create a file called:
Platform.cs - Place the following code in that file:
using System.ComponentModel.DataAnnotations;

namespace CommandAPI.Models;

public class Platform
{
    [Key]
    public int Id { get; set; }

    [Required]
    public required string PlatformName { get; set; }
}
This creates a Platform model with 2 properties:
Id: an integer representing the primary key in our databasePlatformName: a string representing the name of a platform
You'll note that we've decorated the properties with annotations ([Key] & [Required]) which help us to specify further how EF Core should treat these properties. When we move on in later chapters to look at validation, we'll switch to the EF Core Fluent API to define these types of behaviors on the models.
Get in to the habit of saving files, and running: dotnet build at regular intervals.
DB Context
Next up is our DB Context, this acts as am intermediary between the Models (internal representations of our data), and the persistent data source, in this case the PostgreSQL database.
- Create folder in the root of the project called:
Data - Inside that folder create a file called:
AppDbContext.cs - Place the following code in that file:
using CommandAPI.Models;
using Microsoft.EntityFrameworkCore;

namespace CommandAPI.Data;

public class AppDbContext : DbContext
{
    public AppDbContext(DbContextOptions<AppDbContext> options) : base(options)
    {

    }

    public DbSet<Platform> Platforms { get; set; }
}
This code:
- Creates a
AppDbContextclass that inherits from theDbContextbase class. - Implements a default constructor
- Creates a
DbSetrepresenting thePlatformmodel (note theDbSetis the pluralized form of platform)
.NET Configuration
Earlier in this chapter we created .env files to allow us to inject sensitive information to the docker-compose file. This configuration is related to Docker only at this point. While it could be extended and used by the .NET application, .env files are not natively supported by .NET (Configuration).
Instead, we're going to leverage some of the other configuration sources available via .NET Configuration to configure the .NET application.
Configuration Sources
In the Project Tour in Chapter 2 we briefly touched upon the use of the appsettings* files. These are just 1 source for the .NET Configuration layer. The others are:
- User Secrets: Use to store sensitive Development environment config
- Environment Variables: System-level or process-level variables set on the host machine, can be used in Production Environments
- Command-Line Args: Configuration passed when starting the application.
- Cloud Secrets Managers: Cloud-based secret management services (Azure Key Vault, AWS Secrets Manager, etc.).
You can read much more about .NET Configuration in the Theory section
In this chapter we're going to make use of:
appsettings.Development.json: to store non-sensitive development environment config- User Secrets: to store sensitive development environment config.
Appsettings
Open appsettings.Development.json and update it as follows:
{
  "Logging": {
    "LogLevel": {
      "Default": "Information",
      "Microsoft.AspNetCore": "Warning"
    }
  },
  "ConnectionStrings": {
    "PostgreSqlConnection":"Host=localhost;Port=5432;Database=commandapi;Pooling=true;"
  }
}
You'll see we've added a key: ConnectionStrings, that contains part of the connection string to the PostgreSQL database, including:
- Host
- Port
- Database
From our work with setting up Docker, these should be familiar enough to you.
You'll note that we've not included the User Id and Password for the PostgreSQL user as these are sensitive in nature (appsettings.Development.json is under source control), so we'll place these in user secrets.
User Secrets
To add the PostgreSQL user and password to user-secrets, at a command prompt type:
dotnet user-secrets init
This initializes user secrets by:
- Generating a GUID
- Creating a folder named after the GUID (in your local file system)
You can see (and if you like edit) the GUID by looking in the .csproj file:
<Project Sdk="Microsoft.NET.Sdk.Web">

  <PropertyGroup>
    <TargetFramework>net10.0</TargetFramework>
    <Nullable>enable</Nullable>
    <ImplicitUsings>enable</ImplicitUsings>
    <UserSecretsId>380e1efe-cbbc-46b0-8068-1a16603797cf</UserSecretsId>
  </PropertyGroup>
We can now set as many user secrets as we like, these will be placed into a JSON file located in the folder that has just been created.
At a command prompt, enter the following to set user secrets for both user id and password:
dotnet user-secrets set "DbUserId" "postgres"
dotnet user-secrets set "DbPassword" "pa55w0rd"
For each secret you should see output similar to the following:
Successfully saved DbUserId to the secret store.
We now have a situation where we are specifying (amongst other things) the database password in:
.env: used by Docker Compose- User Secrets: used by the .NET API
If we decided to change the password that is used by Docker, we'd need to change this in user secrets too.
The question is: should we not just have this config in 1 place?
Technically this is entirely possible, however keeping the configuration separate for each of these systems is the correct thing to do, as they are entirely distinct:
- The config in
.envis setting up or defining the password for the database platform - The config in User Secrets is specifying the password the app needs to use
In production scenarios, these 2 cases are completely separate, and therefore the config should be handled and defined separately.
Reading configuration
Now that we have configured the .NET Configuration sources, we need to read this in to the app. Open Program.cs, and add the following code:
var builder = WebApplication.CreateBuilder(args);

// Start of new code
var connectionString = new NpgsqlConnectionStringBuilder
{
  ConnectionString = builder.Configuration.GetConnectionString("PostgreSqlConnection"),
  Username = builder.Configuration["DbUserId"],
  Password = builder.Configuration["DbPassword"]
};
// End of new code

builder.Services.AddControllers();
You will be required to bring in the following using statement:
using Npgsql;
This code:
- Creates a new
NpgsqlConnectionStringBuildercalledConnectionString - Reads in the
PostgreSqlConnectionvalue stored inappsettings.Development.json - Reads in both the user secrets and assigns them to
UsernameandPassword
The result is that we have a fully-formed connection string we can use to connect to our DB.
As discussed in the .NET Configuration theory section, the .NET Configuration API abstracts the configuration sources away from the consumer, meaning that when you write code you don't need to know, (or specify), the config source where the config is, you simply call something like: builder.Configuration["DbPassword"] and the .NET Configuration API determines the correct value for DbPassword.
Registering AppDbContext
Having created the AppDbContext, we need to register it in our DI container so it can be injected elsewhere in our app.
Move over to Program.cs and add the following code just after the config code we added in the last section:
var connectionString = new NpgsqlConnectionStringBuilder
{
  ConnectionString = builder.Configuration.GetConnectionString("PostgreSqlConnection"),
  Username = builder.Configuration["DbUserId"],
  Password = builder.Configuration["DbPassword"]
};

// Start of new code
builder.Services.AddDbContext<AppDbContext>(options =>
  options.UseNpgsql(connectionString.ConnectionString));
// End of new code

builder.Services.AddControllers();
You will be required to bring in the following using statements:
using CommandAPI.Data; // Or whatever namespace you gave the AppDbContext
using Microsoft.EntityFrameworkCore;
This code registers the Db Context in the DI container, passing in the connection string to the DB.
Migrations
The last part of setting up the basic data later is to represent the Platform model down to the database. We do this via process called Migrations.
The approach we are taking here is called: Code First in that we define our models in code, then migrate them down to the database to create the associated artifacts there (tables, keys, indexes etc.).
There are other approaches to syncing data between the app and DB, one of the most popular being Database First. Not surprisingly, you create the necessary artifacts in the database first then pull that schema in to the code.
There are of course pros and cons of both approaches, I'm going Code First as it's more Version Control and Developer friendly.
Important: Before going further, ensure that you have EF Core tools installed as described in Chapter 2
Generating migrations
At a command prompt type:
dotnet ef migrations add InitialMigrations
This should generate a Migrations folder in the root of your project. Examining the 20260107144208_InitialMigrations.cs file there (note that your file will have a different time-stamp), you should see the following:
using Microsoft.EntityFrameworkCore.Migrations;
using Npgsql.EntityFrameworkCore.PostgreSQL.Metadata;

#nullable disable

namespace CommandAPI.Migrations
{
    /// <inheritdoc />
    public partial class InitialMigrations : Migration
    {
        /// <inheritdoc />
        protected override void Up(MigrationBuilder migrationBuilder)
        {
            migrationBuilder.CreateTable(
                name: "Platforms",
                columns: table => new
                {
                    Id = table.Column<int>(type: "integer", nullable: false)
                        .Annotation("Npgsql:ValueGenerationStrategy", NpgsqlValueGenerationStrategy.IdentityByDefaultColumn),
                    PlatformName = table.Column<string>(type: "text", nullable: false)
                },
                constraints: table =>
                {
                    table.PrimaryKey("PK_Platforms", x => x.Id);
                });
        }

        /// <inheritdoc />
        protected override void Down(MigrationBuilder migrationBuilder)
        {
            migrationBuilder.DropTable(
                name: "Platforms");
        }
    }
}
This file describes:
- What EF Core needs to do in order to replicate the
Platformmodel down to the DB (theUpmethod). - What EF Core needs to do in order to roll back the migration.
Note that all we have done at this point is generate migration files, we have not yet executed them.
In reference to one of the advantages of the Code First approach, specifically version control friendliness, the inclusion of these migration files in your source code repository is really what I'm referring to.
These files are committed to our code repositories, meaning we have a clean audit of the evolution of the database schema, and perhaps more importantly, a clean way to roll back these changes should that be required.
Running migrations
At a command prompt type:
dotnet ef database update
You should see output similar to the following:
Applying migration '20260107144208_InitialMigrations'.
Done.
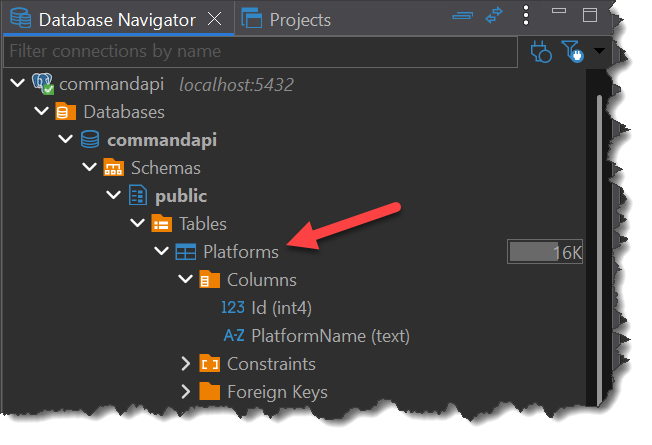
Opening DBeaver and refreshing the tables on the database, you should see the following:
Version Control
Now is the time commit and push your code, (I'm assuming you're still on the main branch), to do so:
git add .
git commit -m "feat: add a basic data layer to the API"
git push origin main
The format I've used for the git commit message follows a pattern referred to as conventional commits.
You can read more about that in the theory section on Git.
In the next chapter we'll explore the use of feature branches, merging to main only when we're happy with the completed code.
Conclusion
Even though this chapter was entitled: Basic Data Layer, we covered a lot of ground once again. We've set up a solid foundation on which to evolve our data layer, and we have done so in a secure way by using various development-friendly configurations.
There would be a good chance of something not working for you in this chapter as there are a lot of moving parts. If that has happened follow th steps again and check for:
- Typos
- Omissions
- Case-sensitivity
- Ensure docker is running, as is your PostgreSQL DB
- Compare your solution with the repository here.
Next up, we round out the foundation build by introducing a Controller.