3. Initial Build
About this chapter
In this chapter we'll scaffold up a .NET 10 controller-based API and:
- Test it with REST API client
- Remove redundant boilerplate code
- Add initial packages we'll need to implement our data layer
- Place under Git source control and push to GitHub
Learning outcomes
- Understand how to scaffold up a .NET controller-based API
- Understand the differences between controller-based and minimal APIs
- Understand how to add packages to our .NET project
- Understand the role of a
.gitignorefile - Understand how to initialize a local Git repo and create a commit
- Understand how to create a remote GitHub repository and push a code to it
- The code for this section can be found here on GitHub
- The complete finished code can be found here on GitHub
Scaffold the API
Open a command prompt and navigate to your working directory. For example, I want to place my API project in the following location: /dev/dotnet/Run2, so I'd type:
cd ~/dev/dotnet/Run2
Then run the following command to scaffold up a simple example of a controller-based API:
dotnet new webapi --use-controllers -n CommandAPI
You should see output similar to the following:
The template "ASP.NET Core Web API" was created successfully.

Processing post-creation actions...
Restoring /home/ljackson/dev/dotnet/Run2/CommandAPI/CommandAPI.csproj:
Restore succeeded.
Here we specified:
webapi: the project template, as the name suggests it creates a Web API project. There are many more project templates to choose from type:dotnet new listfor the full list.--use-controllers: if we want to use controllers in our API project we need to explicitly state we want to use them. If not specified the default is used which is the Minimal API pattern.-n CommandAPI: specifies the name of our projectCommandAPI
Following the successful creation of the project, change into the project directory CommandAPI and start a VS Code session:
cd CommandAPI
code .
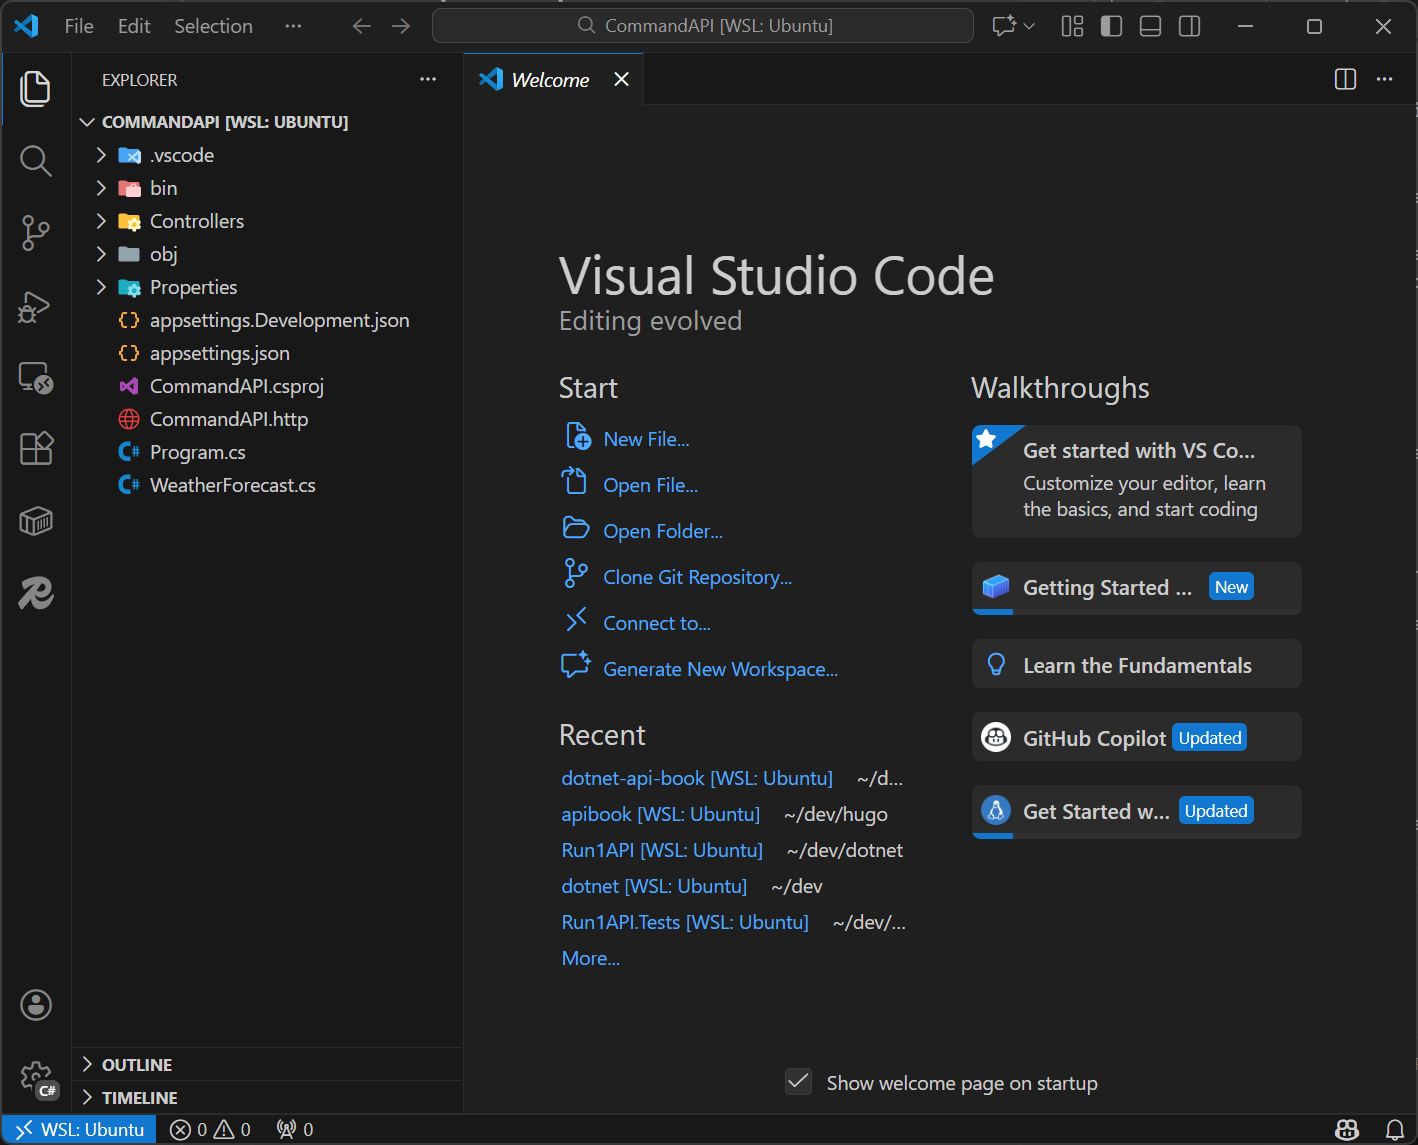
This should open a new session of VS Code with our project:
There are 2 concepts I think are worth focusing on briefly here:
- Controller based APIs
- Minimal APIs
You can deep dive these concepts in the relevant theory sections, but I want to cover them quickly here.
Controller-based and Minimal APIs are 2 different architectural patterns that govern how the API is architected internally. 2 important points to note:
- Both patterns can be used to implement REST APIs
- You can use both patterns in the same project, they are not mutually exclusive
- Personally I don't like this approach, it mixes 2 architectural styles - which I think is messy and confusing
The use of Controllers directly aligns to the MVC pattern (read more about that here), meaning that we implement a controller for each resource-type, in our case that would be:
- PlatformsController
- CommandsController
You could implement the exact same functionality with a minimal API, they just don't employ the organizational mechanism of a controller, the endpoints just directly appear in Program.cs.
I have chosen to use controllers as we'll end up with a sufficient number of endpoints by the end of the project build, so I simply want to organize them in a way that makes sense to me. Controllers fit that brief.
Project Tour
Let's take a quick look at some of the main aspects of our project.
bin
The bin folder Contains the final build output (compiled binaries). These are executable files that we can run and distribute. When we come to putting our project under source control using Git, this folder will be excluded as it does not contain source code.
Controllers
This folder will contain all the controllers that we'll create. Currently this contains the WeatherForecastController that has 1 GET action (to return weather data). After exercising this in the next section we'll delete this file.
obj
obj Contains intermediate compilation artifacts and temporary files used during the build process. This includes partially compiled code, resolved dependencies, and metadata files that help with incremental builds. Again this folder will be excluded from source control.
Properties
Contains launchSettings.json which allows us to configure how we want the API to start, e.g. what ports we want to assign to both HTTP and HTTPS endpoints.
appsettings
appsettings.json contains the baseline configuration that we want our application to inherit as a starting point, and forms part of the overall .NET Configuration Layer. appsettings.Development.json contains any development specific config and will be applied "over" appsettings.json in development environments.
You can read more about the different configuration sources in .NET and their order of precedence here.
CommandAPI.csproj
This is the main project file for our app, let's take a look:
<Project Sdk="Microsoft.NET.Sdk.Web">

  <PropertyGroup>
    <TargetFramework>net10.0</TargetFramework>
    <Nullable>enable</Nullable>
    <ImplicitUsings>enable</ImplicitUsings>
  </PropertyGroup>

  <ItemGroup>
    <PackageReference Include="Microsoft.AspNetCore.OpenApi" Version="10.0.0" />
  </ItemGroup>

</Project>
Here you can see some project config such as:
TargetFramework: in our case this is .NET 10Nullable: do we want to be warned about potential null references. This is useful, but really annoying!ImplicitUsings: this is a feature that if enabled includes common namespaces (aka packages) so we don't need to explicitly include them at the start of each source file. This just reduces the bloat and enhances readability.
You will also see that this is where any additional packages references are added to provide additional functionality in our app. We'll add some new ones in just a bit.
CommandAPI.http
This is HTTP Request file that is used in conjunction with the REST Client VS Code extension we installed earlier. We'll use this to exercise the scaffolded code.
Program.cs
This is the main entrypoint for our app, and does 2 main things:
-
Sets up services: Creates the web application builder and registers services like controllers and OpenAPI. We'll be working a lot with services and dependency injection as we move through the build so we'll circle back here frequently.
-
Configure the HTTP request pipeline. This is another core concept with .NET APIs relating to a middleware layer that all HTTP requests must traverse. Middleware components can be added and removed, and the order in which they are added is absolutely critical to the correct operation of the app. We'll cover these concepts more as we move through the build, or you can read about them here in the theory section.
WeatherForecast.cs
This is just a simple class that represents a WeatherForecast object, a series of these are passed back from the WeatherForecastController.
Exercise the API
While we won't be using any of the weather forecast features of the scaffolded app, we can use them to validate that everything is working correctly before we proceed to our build. I.e. if the app doesn't work, then there is something wrong with our set up that we'll want to remediate before we start adding code.
I'm making a distinction between exercising the API, and testing the API. I'm defining these as follows:
- Exercising Manually running the code and validating that it works as we expect.
- Testing A formal, automated methodology for validating API logic.
You could absolutely call exercising: Manual Testing - which it is, but I want to be clear in the book that automated testing is a distinctly separate engineering practice.
We only cover testing (as I'm defining it) in Chapter 28 when we look at Unit Testing.
Organize requests
As we'll be using the HTTP Client extension along with .http files to exercise the API throughout the build, let's create a dedicated folder to keep these artifacts organized.
In the root of the project create a folder called: Requests and move the CommandAPI.http file in there, (you can simply drag and drop this file using the VS Code file explorer).
Update launchSettings.json
Taking a quick look at launchSettings.json you will see that we have 2 profiles (http and https):
{
  "$schema": "https://json.schemastore.org/launchsettings.json",
  "profiles": {
    "http": {
      "commandName": "Project",
      "dotnetRunMessages": true,
      "launchBrowser": false,
      "applicationUrl": "http://localhost:5181",
      "environmentVariables": {
        "ASPNETCORE_ENVIRONMENT": "Development"
      }
    },
    "https": {
      "commandName": "Project",
      "dotnetRunMessages": true,
      "launchBrowser": false,
      "applicationUrl": "https://localhost:7276;http://localhost:5181",
      "environmentVariables": {
        "ASPNETCORE_ENVIRONMENT": "Development"
      }
    }
  }
}
We only want to work with the https profile (which provides both http and https endpoints), so lets remove the http profile.
launchSettings.json should now look like this:
{
  "$schema": "https://json.schemastore.org/launchsettings.json",
  "profiles": {
    "https": {
      "commandName": "Project",
      "dotnetRunMessages": true,
      "launchBrowser": false,
      "applicationUrl": "https://localhost:7276;http://localhost:5181",
      "environmentVariables": {
        "ASPNETCORE_ENVIRONMENT": "Development"
      }
    }
  }
}
NOTE: The port numbers that you'll have will probably be different to the ones I have - that's fine. You can either leave yours as-is (just remember to use your port numbers in the code), or you can update so that they match mine.
Local development certificate
As we have:
- Opted to use the
httpsprofile Program.cscontains the following middleware configuration to redirect all requests to thehttpsendpoint:
// Configure the HTTP request pipeline.
if (app.Environment.IsDevelopment())
{
    app.MapOpenApi();
}

app.UseHttpsRedirection(); 👈

app.UseAuthorization();
We will need to set up a self-signed certificate, otherwise requests going to: https://localhost:7276 will be deemed invalid or dangerous depending on the client making the API call.
HTTPS requires a digital certificate to encrypt traffic and verify server identity. In production, certificates are issued by trusted Certificate Authorities (CAs) like Let's Encrypt or DigiCert, these organizations verify you own the domain and issue signed certificates that browsers trust automatically.
A self-signed certificate is one you create yourself without a CA. The certificate works technically (it encrypts traffic), but clients don't inherently trust it because there's no third-party verification. Browsers will show security warnings, and API clients may refuse the connection entirely.
For local development, self-signed certificates are perfect. You're only communicating with localhost, so you don't need external verification. The dotnet dev-certs command generates one specifically for .NET development and adds it to your local trust store, so your machine recognizes it as safe.
Generating one is simple:
- Open the integrated terminal in VS Code
CTRL + `(that's Control1 plus the "backtick" symbol - on a US Keyboard that's the key usually abovetab) - Type the following:
dotnet dev-certs https --trust
This should generate a new development certificate for you (or message you to let you know one already existed).
Run
Let's run the API, by typing the following at a terminal where you are in the root of the project:
dotnet run
This should render something similar to the following:
➜  CommandAPI dotnet run
Using launch settings from /home/ljackson/dev/dotnet/Run2/CommandAPI/Properties/launchSettings.json...
Building...
warn: Microsoft.AspNetCore.Server.Kestrel.Core.KestrelServer[9]
      The ASP.NET Core developer certificate is only trusted by some clients. For information about trusting the ASP.NET Core developer certificate, see https://aka.ms/aspnet/https-trust-dev-cert
info: Microsoft.Hosting.Lifetime[14]
      Now listening on: https://localhost:7276
info: Microsoft.Hosting.Lifetime[14]
      Now listening on: http://localhost:5181
info: Microsoft.Hosting.Lifetime[0]
      Application started. Press Ctrl+C to shut down.
info: Microsoft.Hosting.Lifetime[0]
      Hosting environment: Development
info: Microsoft.Hosting.Lifetime[0]
      Content root path: /home/ljackson/dev/dotnet/Run2/CommandAPI
You'll notice that we still get a warning stating that some clients may not like the local development certificate - if that arises we'll handle that on a case by case basis.
You can see that the app has started and that we can send traffic to 2 endpoints:
http://localhost:5181(although this will be redirected to...)https://localhost:7276
Now open the CommandAPI.http file you placed in to the Requests folder and update it so that we send traffic to the https endpoint, it should look as follows:
@CommandAPI_HostAddress = https://localhost:7276

GET {{CommandAPI_HostAddress}}/weatherforecast/
Accept: application/json

###
Right click on the GET request and select Send Request:

This should open a response window in VS Code and present the results to us:
HTTP/1.1 200 OK
Connection: close
Content-Type: application/json; charset=utf-8
Date: Sun, 28 Dec 2025 14:56:47 GMT
Server: Kestrel
Transfer-Encoding: chunked

[
  {
    "date": "2025-12-29",
    "temperatureC": 53,
    "temperatureF": 127,
    "summary": "Bracing"
  },
  {
    "date": "2025-12-30",
    "temperatureC": 11,
    "temperatureF": 51,
    "summary": "Hot"
  },
  {
    "date": "2025-12-31",
    "temperatureC": 31,
    "temperatureF": 87,
    "summary": "Cool"
  },
  {
    "date": "2026-01-01",
    "temperatureC": 6,
    "temperatureF": 42,
    "summary": "Balmy"
  },
  {
    "date": "2026-01-02",
    "temperatureC": 28,
    "temperatureF": 82,
    "summary": "Cool"
  }
]
Given the HTTP/1.1 200 OK response and the fact we have weather data returned this all looks good!
Remove boilerplate
Stop the API from running by issuing a CTRL + C.
We're now going to remove code that we are not going to be using going forward.
- In the
Controllersfolder, delete theWeatherForecastController.csfile. - In the
Requestsfolder, delete theCommandAPI.httpfile. - In the root of the project, delete the
WeatherForecast.csfile.
It goes without saying that our API now doesn't really do anything - don't worry we'll be fixing that soon!
Add packages
We'll be adding quite a lot of packages as we move through the build, but we'll just add the ones we need as and when required. To get started lets add the packages we'll need to support the use of EF Core and PostgreSQL.
At a command prompt in the root of your project2, type the following:
dotnet add package Npgsql.EntityFrameworkCore.PostgreSQL
dotnet add package Microsoft.EntityFrameworkCore.Design
Open the CommandAPI.csproj file to make sure they are there:
 <ItemGroup>
    <PackageReference Include="Microsoft.AspNetCore.OpenApi" Version="10.0.0" />
    <PackageReference Include="Microsoft.EntityFrameworkCore.Design" Version="10.0.1">
      <IncludeAssets>runtime; build; native; contentfiles; analyzers; buildtransitive</IncludeAssets>
      <PrivateAssets>all</PrivateAssets>
    </PackageReference>
    <PackageReference Include="Npgsql.EntityFrameworkCore.PostgreSQL" Version="10.0.0" />
  </ItemGroup>
Git
Next we're going to put our project under local source control using Git, so the first thing we want to do is create a .gitignore file. This file tells Git what project artifacts (which may or may not exist) to exclude from source control.
A .gitignore file is exceedingly useful as you only want to add source code to Git, meaning the files that can be used to generate binaries, not the binaries themselves.
It's also used to exclude things like: data files, certain types of config and of course anything secret. You would not want to commit passwords and API keys to Git repo, and certainly not to a public repo that you find on GitHub.
At a command prompt type:
dotnet new .gitignore
This should result in the successful creation of a .gitignore file in the root of the project. The defaults are sufficient for now, if we take a quick look at the # Build results section of the file you'll see:
# Build results
[Dd]ebug/
[Dd]ebugPublic/
[Rr]elease/
[Rr]eleases/
x64/
x86/
[Ww][Ii][Nn]32/
[Aa][Rr][Mm]/
[Aa][Rr][Mm]64/
bld/
[Bb]in/
[Oo]bj/
[Ll]og/
[Ll]ogs/
The highlighted entries ensure that the bin and obj directories and their contents are not committed to Git.
Next we want to put our project under source control, so at a command prompt type:
git init
git add .
git commit -m "Initial commit"
What does this do?
git init: Initializes the local Git repositorygit add .: Adds or stages all files and folders to the repository (excluding those in.gitignore)git commit -m "Initial Commit": This fully "commits" the changes to our repo with a message.
Git is a massive subject, we'll be using it more throughout the book, so I feel that is the best way to learn it rather than discussing it in detail here. If you want to spend some time reading about it you can read the theory section.
If you type:
git branch
This will list the current name of the first branch, in my case this was master. To follow more up to date naming conventions I want to rename this to main, to do so, type:
git branch -M main
You can issue the git branch command again to check that it was renamed.
GitHub
We now want to push our code up to GitHub, so ensure before you move on that:
- You have created an account on GitHub
- You have installed the GitHub CLI
Create repository
Login to GitHub:
- Navigate to
Repositories& click theNewbutton - This will bring up a new repository creation form, I've filled mine out as follows:
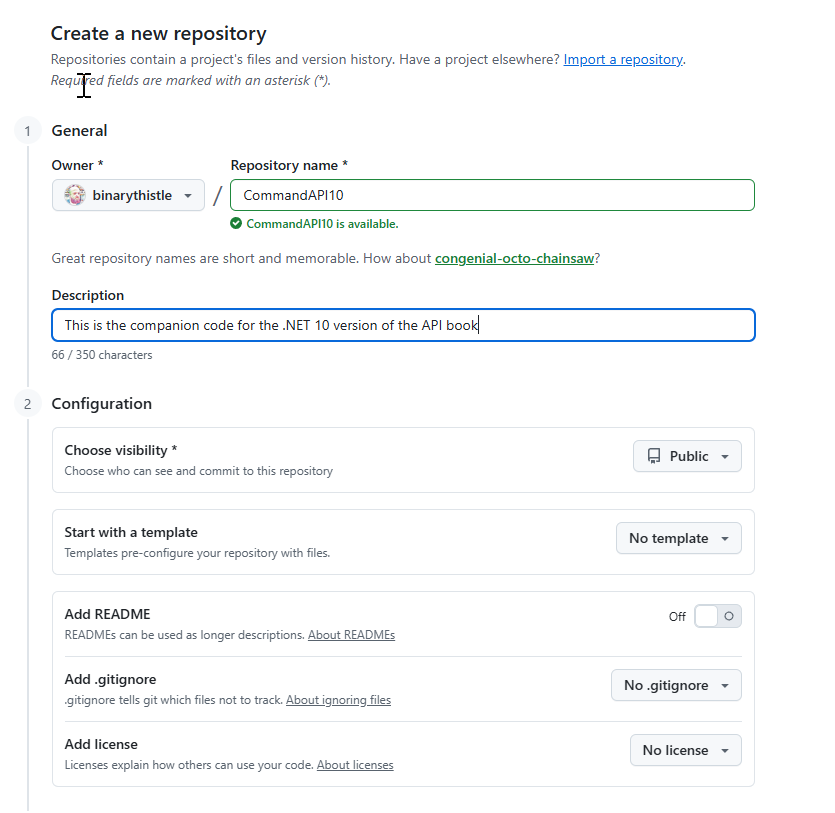
After creating the repo, you'll be presented with something similar to the following:
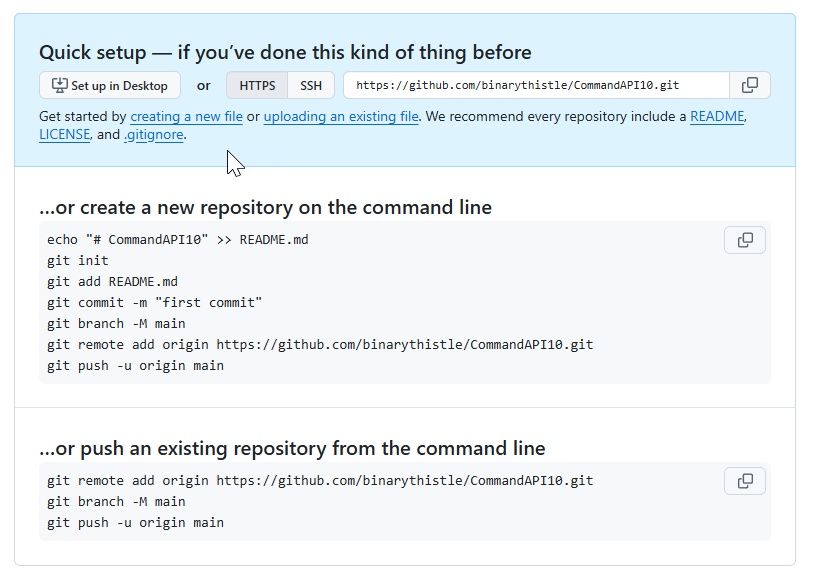
You should note at this point all we have done is create an empty GitHub repository, it has absolutely no association (yet) with the local Git repository we have created on our machine.
Authenticate to GitHub
Before linking the local repository with our newly created remote GitHub repo, we should ensure that we are authenticated to GitHub from within our CLI, if not then we'd not be able to push our local code to GitHub.
At a command prompt type:
gh auth login
- Select:
GitHub.comfor the account - Select
HTTPSfor the preferred protocol - Select
Login with a web browserfor the authentication method - Copy the code generated at the cli & hit
enter
This will open a browser and continue the authentication flow with GitHub. I'm not going to document that here as it will vary depending on your chosen way to authenticate.
Ultimately you'll be asked to:
- Login to GitHub via the web browser using your chosen auth method
- Provide the cli-generated key when prompted by GitHub
At the end of the flow you should be authenticated to GitHub at the CLI, allowing you to push your code. To do so type the type the following at the prompt:
git remote add origin https://github.com/binarythistle/CommandAPI10.git
git push -u origin main
After a successful push, refreshing the page on GitHub you should see your code.
Conclusion
We have covered a lot of ground in this chapter, and the subject areas were wide ranging - moving forward we'll be a little more focused.
Next up we'll build out the basic data layer that will serve us moving forward.