5. Controllers
About this chapter
In this chapter we'll add a Platforms Controller to the API, this includes:
- Creating a feature branch to host our changes
- Creating a controller class
- Adding Create, Read, Update and Delete endpoints
- Creating a GitHub Pull Request and merging
Learning outcomes
- Understand the role of a controller in an API app
- Understand routing
- Understand how to create controller actions
- Understand the role of the
[ApiController]attribute - Understand how to pass back success and error codes
- Understand the role of feature branches and pull requests
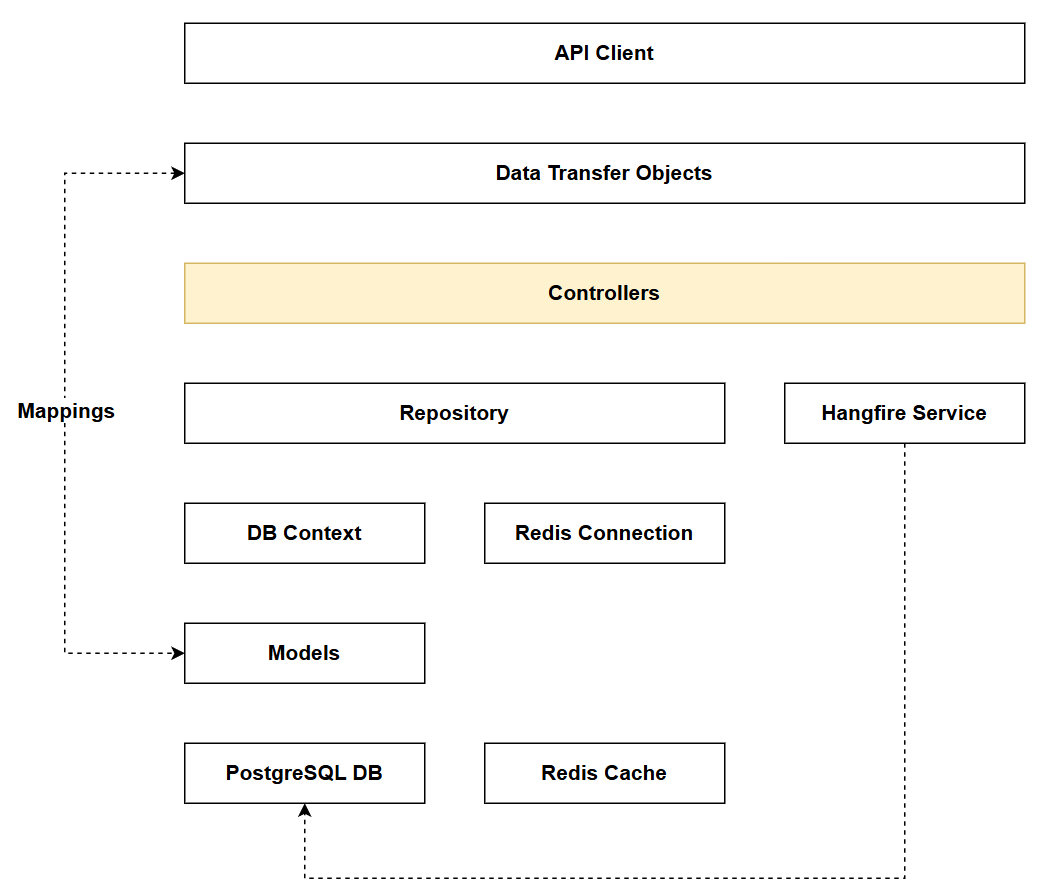
Architecture Checkpoint
In reference to our solution architecture we'll be making code changes to the highlighted components in this chapter:
- Controllers (partially complete)
- The code for this section can be found here on GitHub
- The complete finished code can be found here on GitHub
Feature Branch
Up until now we have just been making changes on the main branch, which is ok to start with, but the time has come to start working with feature branches.
Feature branches allow us to take a snapshot of main in its current state and branch off from there - allowing us make whatever changes we like completely isolated from the working main branch.
This approach has many advantages, including but not limited to:
- Giving us confidence to make complex or potentially breaking changes in isolation (we won't break main)
- Managing the complexity of multiple collaborators.
When we're happy that the code on the feature branch is complete we can then merge those changes back into main. There are different ways to do this, but we are going to use GitHub and Pull Requests.
You can deep-dive Git by reading the theory section.
At a command prompt type:
git branch
This should return main, if not checkout main by typing:
git checkout main
Confirming you're on the main branch, type:
git pull
This just ensures we have the latest copy of main from GitHub.
At this point there should be no one else making changes, but in the future if you're collaborating then it's entirely possible your colleagues will have been making changes. It's therefore always useful to start a feature branch from a recent version of main (you never know a colleague may have implemented the feature or fixed the bug you're about to work on already)
We'll now create and checkout the feature branch by typing:
git branch chapter_5_add_a_controller
git checkout chapter_5_add_a_controller
From this point on we're only making changes to the feature branch.
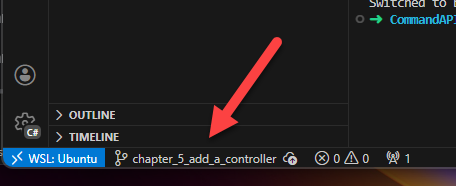
You can type: git branch at any time to check what branch you're on, but there are other ways to get this info.
The current branch is shown in the status bar along the bottom of the VS Code window:
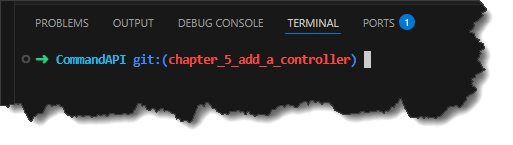
Shell plugins and enhancements can also report this info, for example I'm using the zsh shell with the Oh My Zsh plugin:
Add a controller
Add a file called PlatformsController.cs to the existing Controllers folder, and add the following code:
using CommandAPI.Data;
using CommandAPI.Models;
using Microsoft.AspNetCore.Mvc;
using Microsoft.EntityFrameworkCore;

[Route("api/[controller]")]
[ApiController]
public class PlatformsController : ControllerBase
{
    private readonly AppDbContext _context;

    public PlatformsController(AppDbContext context)
    {
        _context = context;
    }

    [HttpGet]
    public async Task<ActionResult<IEnumerable<Platform>>> GetPlatforms()
    {
        var platforms = await _context.Platforms.ToListAsync();

        return Ok(platforms);
    }
}
This code:
- Creates a new class called
PlatformsController, that inherits fromControllerBase - The class is decorated with the
[ApiController]attribute that confers a host of default API controller behaviors on our class- Read more about this is the theory section
- Has a class constructor that has an
AppDbContextinjected into it for our use - Has 1
ActionResult, decorated with[HttpGet], that returns a collection of platforms- The endpoint can be reached at the following route:
<base_url>/api/platforms/
- The endpoint can be reached at the following route:
The action result is an async method returning a Task of type ActionResult<IEnumerable<Platform>>.
Using an async method has the following benefits:
- Non-blocking I/O operations: database operations like
.ToListAsync()do not block while waiting - Improved scalability: each request is handled by a thread from the thread pool. With synchronous code, that thread would be blocked waiting for the database. With
async, the thread can handle other incoming requests while waiting, allowing the API to serve more concurrent requests with the same resources. - Better resource utilization: Threads are expensive resources. By not blocking them during I/O operations, you reduce thread pool starvation and improve overall application performance under load.
You can read more about the async/await pattern in the theory section.
Exercising
We are in a position to exercise the endpoint we have, we'll do this by creating a .http file to test all requests to the PlatformsController.
In the Requests folder, create a new file called: platforms.http, and add the following code:
@baseUrl = https://localhost:7276
@baseUrlHttp = http://localhost:5181

### Get all platforms
GET {{baseUrl}}/api/platforms
Double check the port numbers you are using are consistent with what you'd find in Properties/launchSettings.json
Then at a command prompt type:
docker ps
This just ensures that docker is running with the PostgreSQL container (if you're working your way through the book you may have stopped Docker)
If Docker Desktop or your container is not started, do so before typing:
dotnet run
As before, in the .http file, right click the request and select: Send Request, you should get as response as follows:
HTTP/1.1 200 OK
Connection: close
Content-Type: application/json; charset=utf-8
Date: Thu, 08 Jan 2026 14:20:54 GMT
Server: Kestrel
Transfer-Encoding: chunked

[]
As you can see this returns an empty JSON array - which is what we'd expect.
Routing
Before moving onto implementing the remainder of the endpoints for this chapter, it's worth circling back to routing.
In addition to [ApiController], the controller class is also decorated with the following attribute that sets up the route pattern for the entire controller:
[Route("api/[controller]")]
The route token ([controller]) is a placeholder that .NET replaces at runtime with the controllers name, minus the Controller suffix, so in this case the route token would be platforms, rendering the route as: /api/platforms.
Of course that is not the entire route, as we need to account for:
- The base url: the values can be found in
Properties/launchSettings.json - The verb to be used as part of the request
As already discussed in the Project Overview, http verbs are of key importance in REST APIs. The verb plus the route makes the endpoint unique.
Remaining endpoints
In this section we're going to add the remaining endpoints to the controller. In order that the code changes take place, be sure to restart the project every time you make changes, i.e:
CTRL + Cto stopdotnet runto start up again
Code changes made to an already running app will not take effect until the app is restarted.
Instead of using dotnet run to start .NET apps, you can use dotnet watch which implements hot reload functionality, meaning that the app will auto-restart every time code changes are made.
I personally don't use this as I've found the results to be inconsistent, so I stick with CTRL + C then dotnet run.
Get a platform by ID
Add the following code to the platforms controller, it should reside inside the class declaration, at the same level as GetPlatforms:
[HttpGet("{id}", Name = "GetPlatformById")]
public async Task<ActionResult<Platform>> GetPlatformById(int id)
{
    var platform = await _context.Platforms.FirstOrDefaultAsync(p => p.Id == id);
    if (platform == null)
        return NotFound();

    return Ok(platform);
}
This code:
- Defines that the endpoint responses to
GETrequests - Defines an additional route parameter
{id}that expects an id to be passed (in the url) with the request, e.g.:/api/platforms/4- The
[ApiController]attribute automatically binds the route parameter{id}to the method parameterint idwithout requiring explicit binding attributes like[FromRoute].
- The
- Defines a
Namefor the route, which allows it to be referenced elsewhere (see the Create endpoint) - Attempts to retrieve a platform from the database with the supplied
id- If it cannot find one - it will return
NotFound()which is the HTTP404status code - If it finds one, then it will return a HTTP
200(OK) with the platform object
- If it cannot find one - it will return
To test this endpoint, update the platforms.http file to include the following request:
### Get platform by ID
GET {{baseUrl}}/api/platforms/1
Run as before, and you should get a 404 not found as we don't have any Platforms in the DB:
HTTP/1.1 404 Not Found
Content-Length: 0
Connection: close
Date: Thu, 08 Jan 2026 14:49:32 GMT
Server: Kestrel
While I'll continue to specify the requests that should be added to the platforms.http file, I'm not going to continue to specify that you need to exercise these - this is now assumed.
Indeed, in reference to the endpoint we just added (GetPlatformById), I'd expect you to re-run this yourself once we implement the Create endpoint.
Create a platform
Add the following code to the platforms controller, it should reside inside the class declaration, at the same level as:
GetPlatformsGetPlatformById
[HttpPost]
public async Task<ActionResult<Platform>> CreatePlatform(Platform platform)
{
    if (platform == null)
    {
        return BadRequest();
    }
    await _context.Platforms.AddAsync(platform);
    await _context.SaveChangesAsync();

    return CreatedAtRoute(nameof(GetPlatformById), new { Id = platform.Id }, platform);
}
This code:
- Defines that the endpoint responses to
POSTrequests at the following route:/api/platforms - Checks to see if the
platformmodel we pass in isnullor not.- If it is
nullreturnBadRequestwhich is a HTTP400response - If not
nullthen attempts to add to the database
- If it is
- When adding to the database the use of
SaveChangesAsync()is mandatory, otherwise changes will not cascade to the DB - Finally, as per REST convention, we return:
- The
platformthat was created - The route at which the
platformcan be reached (we referenceGetPlatformByIdby Name) To exercise this endpoint, update theplatforms.httpfile to include the following request:
- The
### Create a new platform
POST {{baseUrl}}/api/platforms
Content-Type: application/json

{
  "platformName": "Kubernetes"
}
When run, this should return the following:
HTTP/1.1 201 Created
Connection: close
Content-Type: application/json; charset=utf-8
Date: Thu, 08 Jan 2026 15:19:11 GMT
Server: Kestrel
Location: https://localhost:7276/api/Platforms/1
Transfer-Encoding: chunked

{
  "id": 1,
  "platformName": "Kubernetes"
}
Update a platform
Add the following code to the platforms controller, it should reside inside the class declaration, at the same level as:
GetPlatformsGetPlatformByIdCreatePlatform
[HttpPut("{id}")]
public async Task<ActionResult> UpdatePlatform(int id, Platform platform)
{
    var platformFromContext = await _context.Platforms.FirstOrDefaultAsync(p => p.Id == id);
    if (platformFromContext == null)
    {
        return NotFound();
    }

    //Manual Mapping
    platformFromContext.PlatformName = platform.PlatformName;

    await _context.SaveChangesAsync();

    return NoContent();

}
This code:
- Defines that the endpoint responses to
PUTrequests - Defines an additional route parameter
{id}that expects an id to be passed (in the url) with the request, e.g.:/api/platforms/4 - Attempts to retrieve a platform from the database with the supplied
id- If it cannot find one - it will return
NotFound()which is the HTTP404status code - If it finds one, then we update
PlatformNameby using manual mapping (we discuss object mapping later) - We save changes
- Return
NoContent()which is a HTTP204response code
- If it cannot find one - it will return
To test this endpoint, update the platforms.http file to include the following request:
### Update a platform
PUT {{baseUrl}}/api/platforms/1
Content-Type: application/json

{
  "platformName": "Docker Updated"
}
Run whatever further test scenarios you feel will adequately exercise this endpoint.
Delete a platform
Add the following code to the platforms controller, it should reside inside the class declaration, at the same level as:
GetPlatformsGetPlatformByIdCreatePlatformUpdatePlatform
[HttpDelete("{id}")]
public async Task<ActionResult> DeletePlatform(int id)
{
    var platformFromContext = await _context.Platforms.FirstOrDefaultAsync(p => p.Id == id);
    if (platformFromContext == null)
    {
        return NotFound();
    }
    _context.Platforms.Remove(platformFromContext);
    await _context.SaveChangesAsync();

    return NoContent();
}
Aside from the use of the [HttpDelete] attribute and the Remove method, there's nothing particularly novel about this code.
To test this endpoint, update the platforms.http file to include the following request:
### Delete a platform
DELETE {{baseUrl}}/api/platforms/1
Version Control
With all the endpoints added (for now), and all the requests behaving as expected, we can now merge our feature branch into main as follows:
- Save all files
Then at a command prompt:
git add .
git commit -m "add the platforms controller to the API"
git push
The last command will not push our code to GitHub, instead it will return with an error, suggesting the command we need to run:
fatal: The current branch chapter_5_add_a_controller has no upstream branch.
To push the current branch and set the remote as upstream, use

    git push --set-upstream origin chapter_5_add_a_controller
Copy that line and execute it:
git push --set-upstream origin chapter_5_add_a_controller
That should push the code to GitHub.
I always use this approach (git push) knowing it will fail, and then giving me what I need. If you're comfortable directly entering in the correct line 1st time - please do so.
Move over to GitHub and select your repository, you should see something like this:
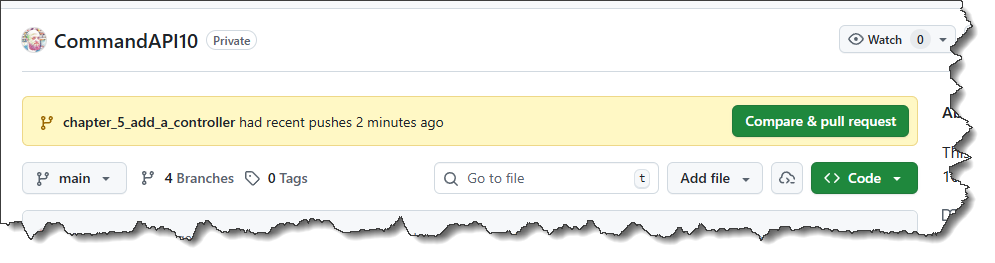
- Click Compare & pull request, this should take you to the Open a pull request screen. We really should add further narrative to the description (feel free to do so), in the interests of brevity I won't.
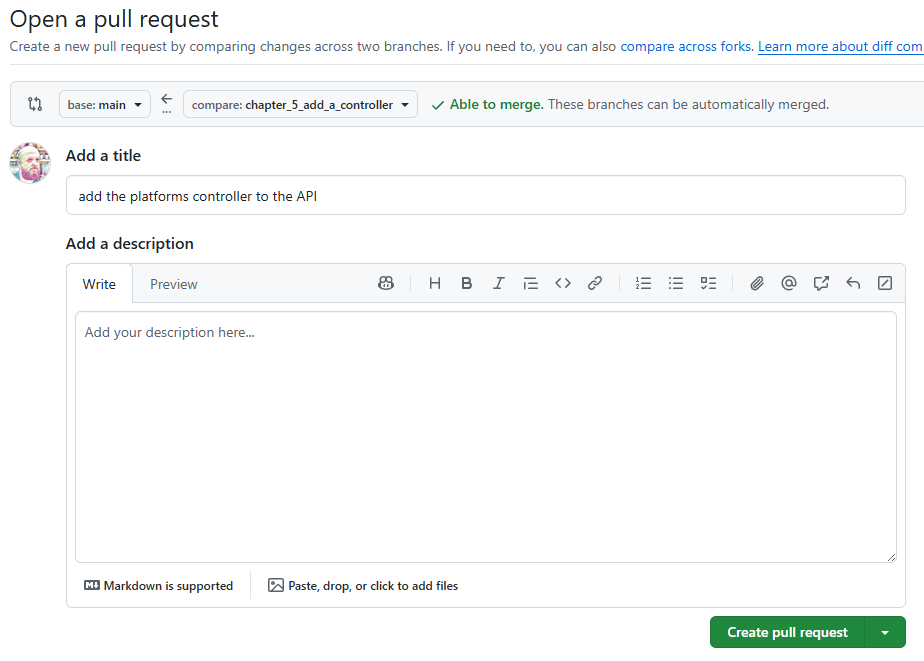
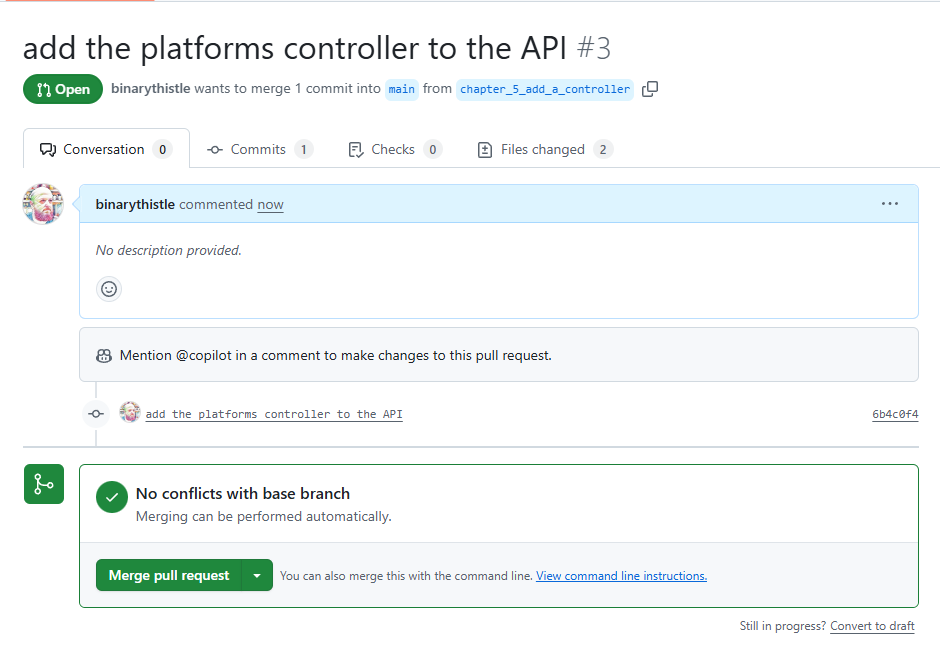
When happy click: Create pull request this takes you to the merge pull request screen:
The Pull Request workflow I'm detailing here is somewhat artificial as you are the only participant. Typically, there would be other actors involved at this point, for example you would usually:
- Invite someone to review your code (this would be mandatory before merging)
- Have an AI review your code
- Observe the output from a CI/CD pipeline - detailing how regression testing (amongst other things) is doing
- We cover testing later.
In short, the raising of a Pull Request is just the start of what can be quite an elaborate workflow, designed to ensure that only quality code makes its way to production. If certain mandatory steps are not completed, (code-review, clean regression test run, code linting rules etc.) you would not be allowed to merge your code.
We'll cover more of these topics later in the book.
For now, we can just Merge pull request!
Click: Merge pull request, then: Confirm merge to merge the changes into main. You should see the following:

This means that main on GitHub has been updated as the central source of truth. Locally what we have is:
- The feature branch
- Local
main(now out of date)
At a command prompt back on your machine:
git checkout main
git pull
This will checkout the main local branch and pull any new changes down from GitHub main.
At this point everything is synched.
If you type:
git branch
The following branches will be listed:
main(current branch) and the feature branch we just completed.chapter_5_add_a_controller: the feature branch we just pushed and merged
What do we do with the feature branch now? You can delete it if you like:
git branch -D chapter_5_add_a_controller
Or leave it in place. If the PR was still open and being reviewed, you'd keep it as chances are you'd need to make some updates following a code review.
We'll leave Git there for now.
We'll be using feature branches throughout the rest of the book, so while I'll prompt you to create a new feature branch at the start of each chapter, I'll be keeping instructions concise to avoid bloat. More importantly, this approach will get you into the habit of learning the workflow.
Conclusion
This was a more focused chapter on Controllers (although we did spend some time on Git as well). I don't feel there's anything too challenging about this chapter, if you want to dive deeper into any of the concepts than I'd suggest the following theory:
Technically we have a working API with some basic CRUD endpoints. However this is very basic and just the start, we have long way to go to bring it up to scratch.
In the next part we enhance the data layer, starting with implementing Data Transfer Objects.