2. Environment set up
About this chapter
In this chapter we'll go through what you need to do in order to have a development environment ready to go, including:
- The tools you'll need to install
- Any configurations you'll need to make
Learning outcomes
- Understand the requirements to develop and run the API project.
Operating system
I've deliberately made technology choices for the project that will work across the 3 main desktop environments:
- Windows
- MacOs
- Linux
You can choose any one of those, and for the most part the tools you'll use will be the same. Some assumptions and points to note:
- I'm assuming you are running a supported, relatively recent version of your chosen OS (so no Windows Millennium Edition please)
- The OS is running on suitably powered hardware (these requirements will vary from OS to OS)
- You have a degree of comfort in using that OS
- You understand the basics of the command line for your chosen OS, primarily file system operations
From a command line perspective I'll be using Linux (Ubuntu) with the zsh shell for the examples in the book. This means that Mac and Linux users can follow verbatim, Windows users may need to make some adjustments depending on what you're using. If you want to use native Windows I'd suggest PowerShell, in which case those adjustments should be limited in most cases.
FYI I'm running Windows 11 with Windows Sub-system for Linux (WSL), so from a CLI perspective I'm using Ubuntu, from a desktop application perspective it's Windows.
Tools to install
In this section we'll detail the tools that you should install if you want to develop and run the project (including VS Code extensions).
I've decided not to provide detailed step-by-step install instructions as the software vendors already provide these - links are provided. I will call out any "gotchas", and specify any non-standard config.
For the most part these tools can be installed in any order, however I'd suggest following the sequence as there are a few interdependencies.
.NET 10 SDK
The download site for the .NET SDK can be found here, along with instructions for your chosen OS.
Reminder: This book assumes the use of .NET 10
Once installed, type the following at a command prompt to test the install:
dotnet --version
You should see version 10 returned.
➜  ~ dotnet --version
10.0.100
EF Core Tools
We'll be using EF Core as the project ORM, to do so we need to install the tools that will allow us to execute commands in the CLI. To install type the following:
dotnet tool install --global dotnet-ef
From time to time you'll get prompted that the tools you are using are out of date, in this case you just need to update:
dotnet tool update --global dotnet-ef
Further info on EF Core tooling can be found here
VS Code
VS Code download site can be found here, and detailed setup instructions for all major OS's can be found here.
I always ensure that I add VS Code to my path so that I can type code at a command prompt to launch it.
With VS Code installed, let's take a look at the extensions I'd recommend.
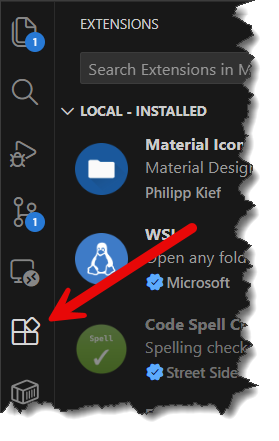
Extensions can be located on the left hand side bar in VS Code with the following icon:
VS Code has an extensive array of extensions that you can install, so feel free to look at others that may enhance your own particular workflow beyond those I've suggested here.
C# Extension
Search for the following extension: "C#", this should return the Base language support for C# extension by Microsoft. This provides C# language support in VS Code, such as syntax formatting, intellisense, etc.
Container Tools
Search for the following extension: "Container Tools", this should return the Container Tools extension by Microsoft which can be used to perform basic administrative tasks with Docker.
We'll be using Docker to host both PostgreSQL and Redis.
REST Client
Search for the following extension: "REST Client", this should return the REST Client extension by Huachao Mao. We'll use this extension to make calls to our API from within VS Code, negating the need for a dedicated REST client app like Postman.
Docker Desktop
We'll be using containers to run both PostgreSQL and Redis so we'll need something to achieve that. There are a few different ways you can do that, by far the most straightforward is to use Docker Desktop. You can download it here.
You only need to have Docker Desktop installed for now; we'll cover setting up PostgreSQL and Redis in subsequent chapters.
Git
We'll use Git for source control (and you can use it to clone the example project from GitHub too). Depending on the OS you're using Git may already be installed, to check type:
git --version
If it's installed it'll return a version number, otherwise it's probably not installed and you'll have to install it. Detailed instructions on installing can be found here.
Once installed you need to configure your user.name and user.email as these details are required by Git to provide an identity against commits, (you would not want anonymous changes made to a codebase).
These are configured as follows (replace my details for yours of course!):
git config --global user.name "Les Jackson"
git config --global user.email "les.jackson@example.com"
GitHub CLI
The GitHub CLI (gh) allows us to interact with GitHub via the command line. We'll be using it to authenticate to GitHub from a command line, this means we can push local code to our remote (GitHub) repository.
The GitHub CLI site can be found here where you can download the tool, and review the install instructions for your OS.
DBeaver (optional)
DBeaver is an integrated graphical environment that can be used to administer a number of different databases and run SQL queries. The free Community Edition is "limited" (I use that term loosely) to working with only relational databases, which is still perfectly OK for PostgreSQL. If you want to install, you can visit the DBeaver site here.
Redis tooling (optional)
Redis will be our 2nd data store (used for caching) working alongside PostgreSQL. You have a choice of a number of tools that you can use to administer and work with Redis as mentioned in the Redis docs.
I'm going to use the CLI for the examples in the book as I feel using it will allow you to get to grips with Redis concepts faster than using GUI-based tooling.
API Client (optional)
The REST Client extension we installed for VS Code will act (no surprises!) as our API client for the majority of the book (we will develop a simple web client too). However many of you may want to use a dedicated client to exercise the API endpoints. While I won't be detailing their use in the book, I've found the following to be decent options:
- Postman
- Insomnia
- Bruno
Accounts to create
GitHub
GitHub works hand in glove with Git, we'll use it for our centralized code repository. You can sign up for an account here.
Auth0
I've chosen Auth0 as our external authentication provider, you can sign up for a free account here.
Conclusion
This chapter was a brief whistle-stop tour in setting your base development environment. Some points to note:
- Further setup (e.g. running up Docker containers for PostgreSQL & Redis) will be covered in the relevant chapters
- Aside from the core requirements of the API (essentially .NET 10 & C#) you can set up any environment that your comfortable with, so the instructions here act purely as a suggested guide
Let's start building!