Iteration 2 - Deploy to Prod
Iteration Goal
Deploy our API code to a Production environment (Azure), and do so in a way that’s automated - i.e. whenever we want to publish new code this will flow through to production with little, to no effort.
What we’ll build
By the end of this iteration we will have:
- Hosted our code on GitHub
- Created an API App service on Azure
- Configured GitHub actions to build and deploy our app
- Created a Container Instance on Azure (running PostgreSQL)
- Configured out API App service
- Tested our API running on Azure
Iteration Code
The code for this iteration can be found here.
Pushing to GitHub
In Iteration 01 we initialized Git, created a feature branch, and merged that feature branch to main. This was all done with Git on our local machines. This is a good way to work with code locally because you can ensure that any new additions to your code work before merging back to main.
Before I used Git I’d often make changes to code, break everything, and try to revert back to a working copy - this difficult without something like Git…
ctrl+zonly goes so far!
The real power of Git (and source control in general) is when we can share the codebase between multiple developers so they can all work on it at the same time. This is where something like GitHub comes in.
A word about GitHub
Before we move on with setting up GitHub, just a couple of points:
- There are alternatives to GitHub, most notably GitLab and BitBucket, we’re using GitHub because it’s more than likely the platform that you’ll come across in the real world, and also because we want to make use of GitHub Actions. More on that later…
- GitHub (and its alternatives) are not Git. Git is what we have already worked with. These platforms are remote source code repositories that work with Git and share many of the same ideas and concepts.
Create a GitHub Repository
Why are we doing this?
This step is required as we want to host our code somewhere centrally accessible that:
- Allows us to collaborate with other developers
- Enables the use of GitHub Actions - more on this later
In Iteration 0 we discussed the need to set up a GitHub account, so I’m assuming that has been done - if not you’ll need to do it before moving on.
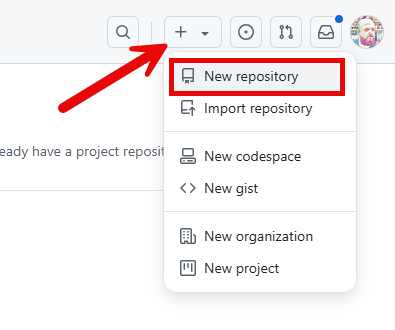
There are number of ways to create a new repository, I always use the dropdown in the top right hand corner of my profile page:
Fill out the new repository form as follows (you can of course name things differently):
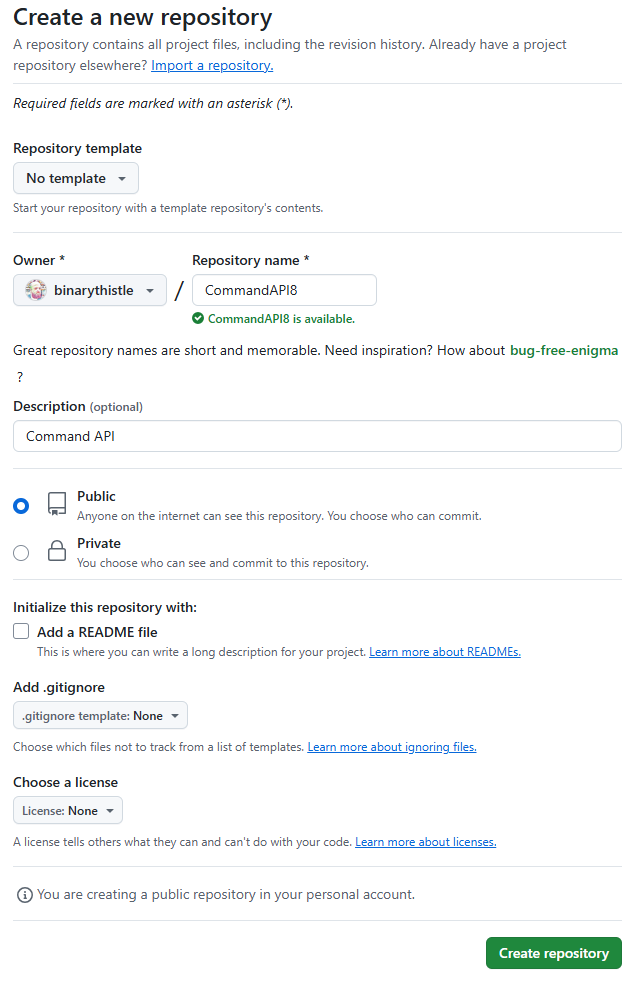
When done, click Create repository and you should see the following page:
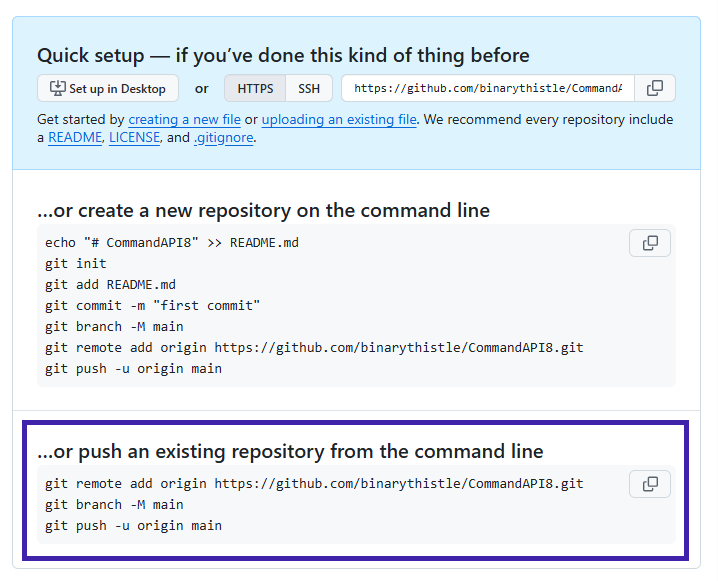
At this point all we have done is create an empty repository on GitHub, there is still no connection between this and our local Git repository. We’ll change that now…
Create Remote
As we already have an existing local Git repository, all we need to do is create a link to our remote (GitHub) repository and push our code up.
Back at a command prompt, make sure you’re “in” the project folder, and type:
git remote add origin https://github.com/binarythistle/CommandAPI8.git
If you’ve called your GitHub repository something different, then change the name accordingly.
Authenticate to GitHub
Before we can push our code up to GitHub from our command line, you may need to authenticate to GitHub (from the command line). To do this I recommend Github Tools - which was another pre-requisite from Iteration 0
To login to GitHub and ensure we’re authenticated to push code, type the following:
gh auth login
If asked, select GitHub.com from the next menu:

Select HTTPS from the next menu:

Select (y) to login with GitHub credentials:

Select: Login with a web browser

Follow the instructions to open the browser:

Select your account:
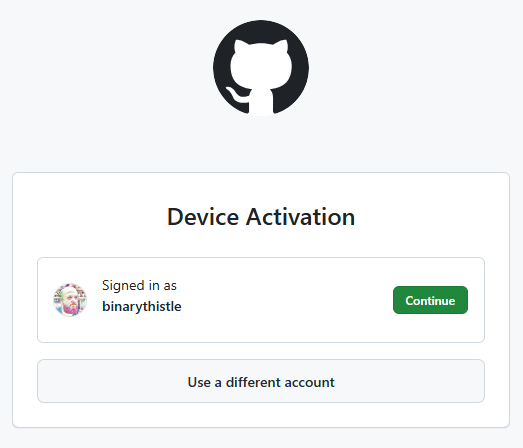
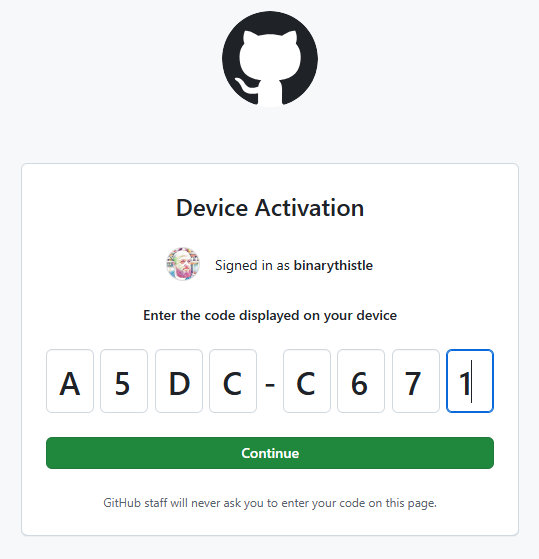
Enter the code and continue
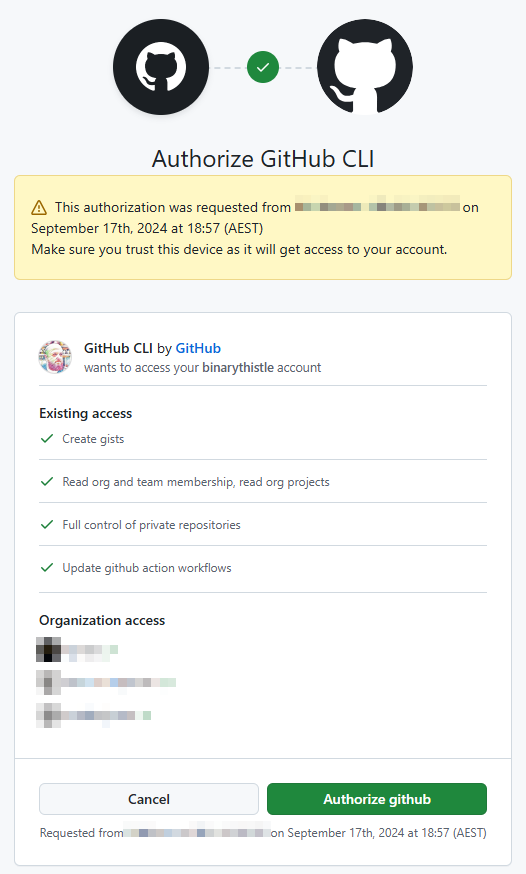
Select Authorize if you’re happy to continue:
You may be asked to login to GitHub again, I’ve not shown this, as the method of login can vary depending on your set up.
And we’re done!
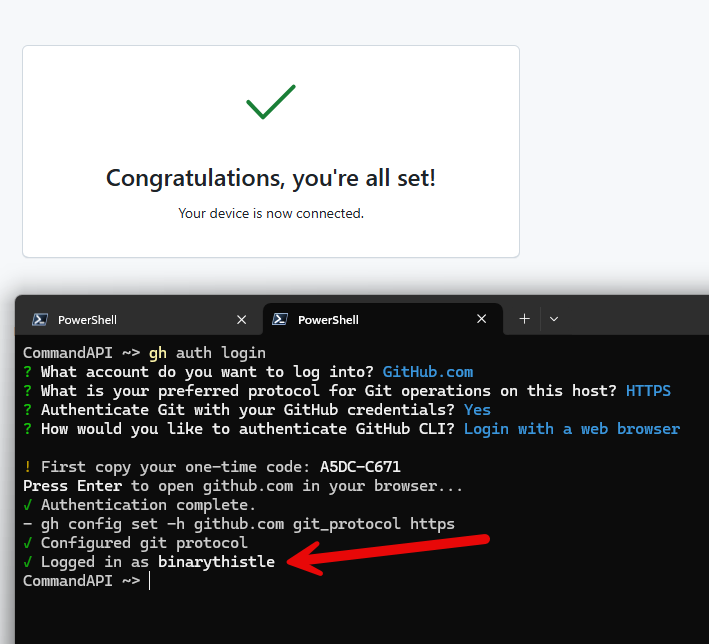
Push the code
Then we just push our code:
git push -u origin main
You should see something similar to:
CommandAPI ~> git push -u origin main
Enumerating objects: 21, done.
Counting objects: 100% (21/21), done.
Delta compression using up to 8 threads
Compressing objects: 100% (18/18), done.
Writing objects: 100% (21/21), 7.85 KiB | 1.96 MiB/s, done.
Total 21 (delta 2), reused 0 (delta 0), pack-reused 0 (from 0)
remote: Resolving deltas: 100% (2/2), done.
To https://github.com/binarythistle/CommandAPI8.git
 * [new branch]      main -> main
branch 'main' set up to track 'origin/main'.
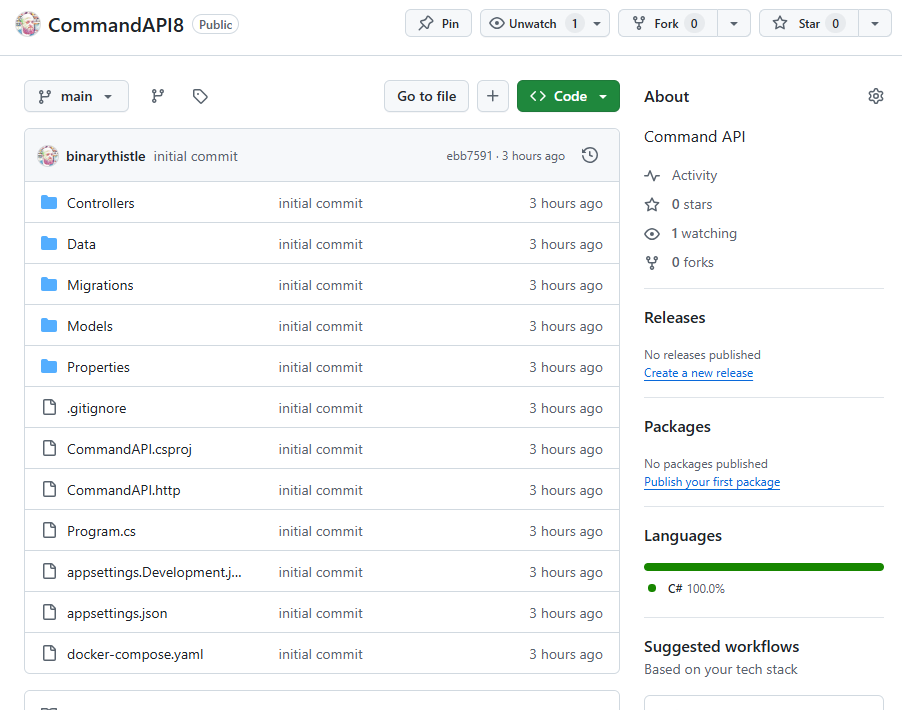
If we refresh the GitHub repository page, you should see that our code has been pushed up to GitHub:
Create an App Service
While having the API running on our local development machine is awesome, ultimately most software is destined for greater things - and that means running in a Production Environment!
There are many ways you can achieve this goal, but for this book we’re going to use Microsoft Azure.
Working with Azure
Not only is Azure a massive, and ever-expanding product (or set of products), it can also be administered in many different ways. In this iteration we’ll be using 2 of those methods:
- Azure Portal - a web interface that has a lower barrier to entry for new users
- Azure CLI - a command line utility that requires a bit more knowledge of Azure
There are pros and cons for each of these (and the others not mentioned), and if you’ve not done so already, I’m sure you will develop your favorite. If you’re like me, you’ll end up using different approaches for different scenarios - which is exactly what we’ll be doing here!
Azure Portal - things change!
As thinking evolves, and different user experience standards take hold, it’s entirely likely that the user interface of the Azure Portal will change from time to time. In the years that I have been using it I have seen it change; sometimes those changes are subtle, sometime no so much…
The point I’m making is that while I will make best efforts to keep the book up to date, there may still be occasions where the Azure Portal steps I outline here, may look different to what you’re experiencing.
If this happens I’m sure your smart enough to navigate on through!
Getting started
Setting up an Azure account was covered in Iteration 0
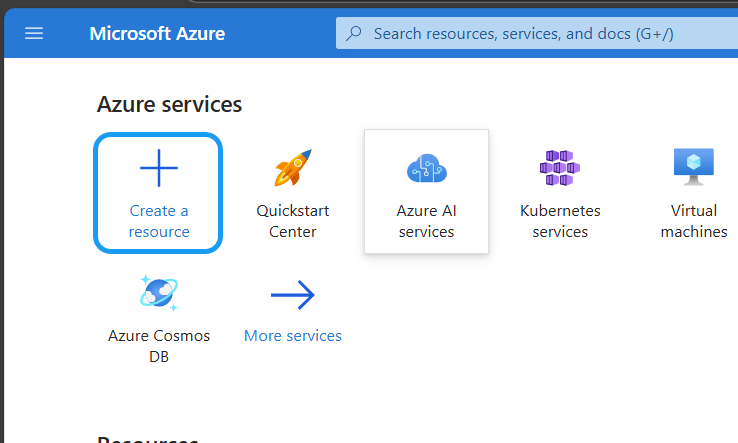
Login to the Azure portal and select Create a resource:
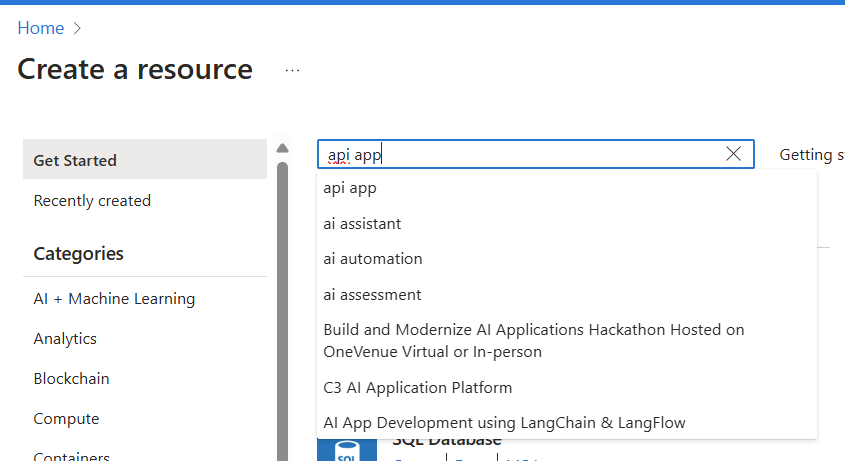
Search for api app & hit enter:
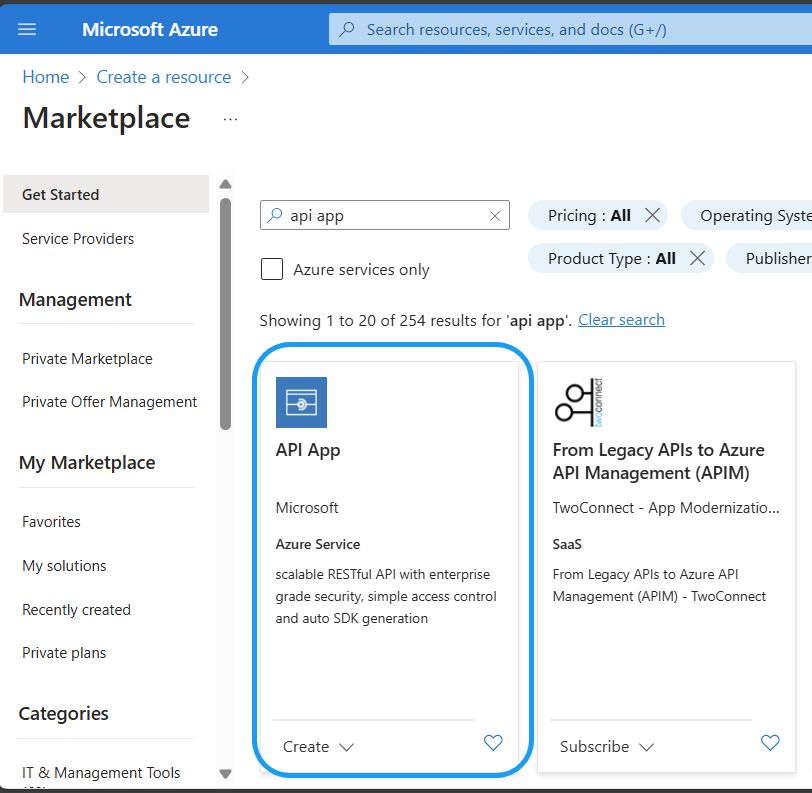
Select the API App from Microsoft
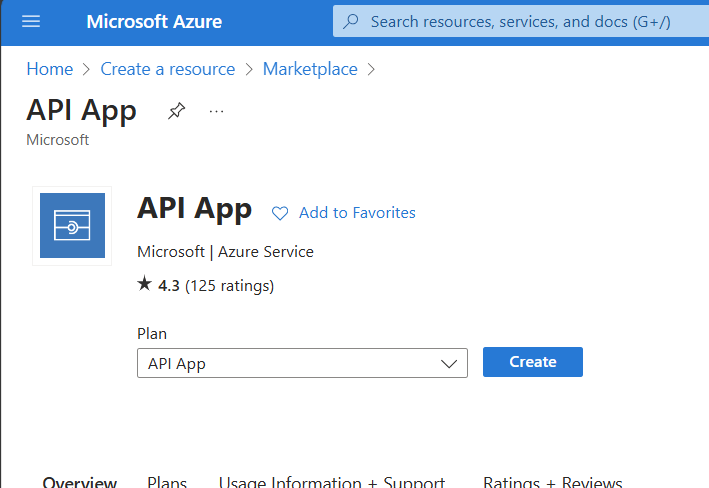
Then select create
There’s a few pages (or tabs) to go through here, with each page potentially having a number of sections. We’ll break it down by page, and then by each section on that page.
Basics
Project Details
- Select your subscription
- Select or create a new Resource Group

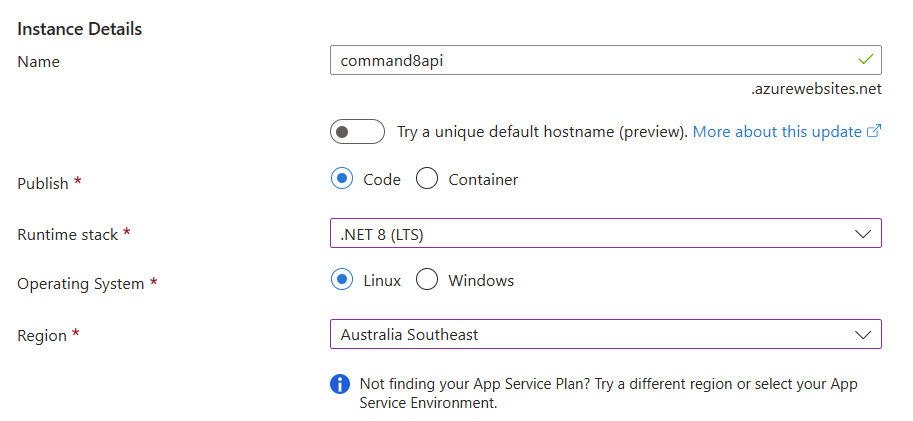
Instance Details
- Name: What ever you want to name your app!
- Uncheck “Try a unique hostname”
- Publish: Code
- Runtime Stack: .NET 8(LTS)
- Operating System: Linux
- Region: Select your geographically closest region
Pricing Plans
- Linux Plan: Select an existing plan or create a new one
- Pricing Plan: Select Basic B1
Azure Pricing
Azure resources can cost money, potentially even a lot of money. So you need to be careful when creating any resource that you understand the cost implications. Microsoft do provide cost management tools to make it easier for you to understand what you’ll be spending.
In this book I’ve tried to balance cost with performance and features, with an emphasis on keeping costs low.

There is a “Free” plan, which is 1 down from the Basic plan we’ve selected, however that does not support the use of GitHub Actions which are a critical part of our deployment pipeline.
Zone Redundancy
- Disabled

Recommended services
- Uncheck all

Click on Next: Deployment >
Deployment
Continuous deployment settings
- Continuous Deployment: Enable

GitHub Settings
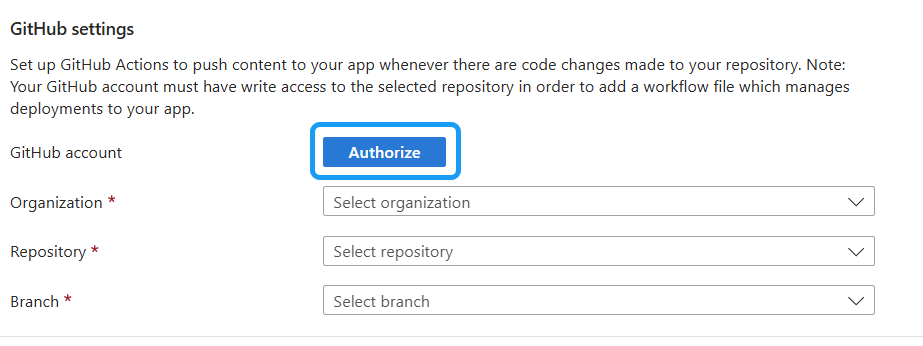
If this is the first time you are doing this you’ll need to connect a GitHub account.
Connecting a GitHub account
- GitHub Account - select Authorize
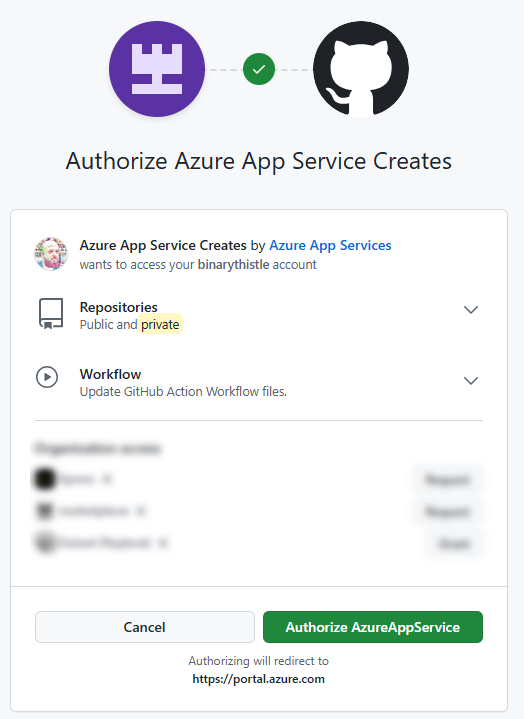
This will open a new window and detect the GitHub account you are logged in with, click Authorize AzureAppService
Depending on how you authenticate to GitHub, you may be asked to login again. I’ve omitted this step as it may look different depending on how you do that.
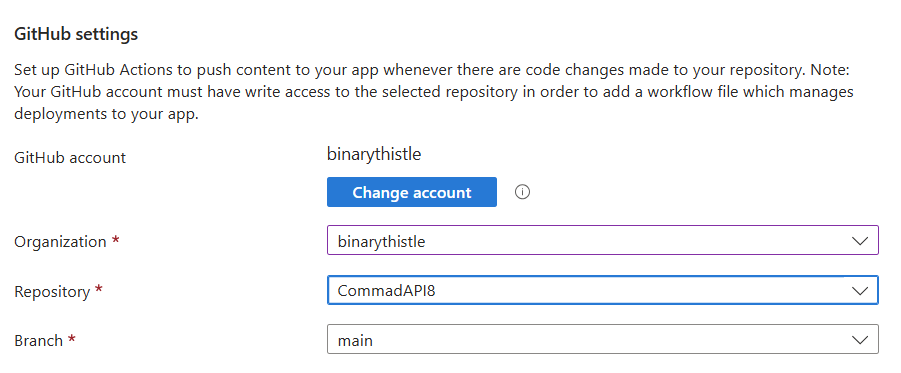
You should be returned to the Deployment page where you can continue to select the following:
- Organization: Your account
- Repository: Your repository (I called mine CommandAPI8)
- Branch: main
Workflow configuration
We will circle back to what this is and go through the contents in more detail, for now we don’t need to view it.
Authentication settings
- Basic authentication: Disable

Click on Next: Networking >
Networking
- Enable public access: On
- Enable network injection: Off

Click on Next: Monitor + secure >
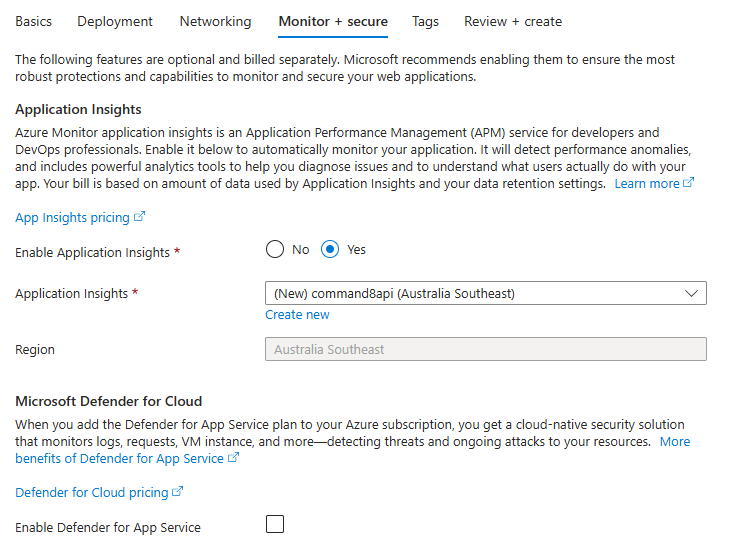
- Enable Application Insights: Yes
- Application Insights: New
Click on Next: Review + create >
Review + create
This will display a review page, ensure your happy and click Create
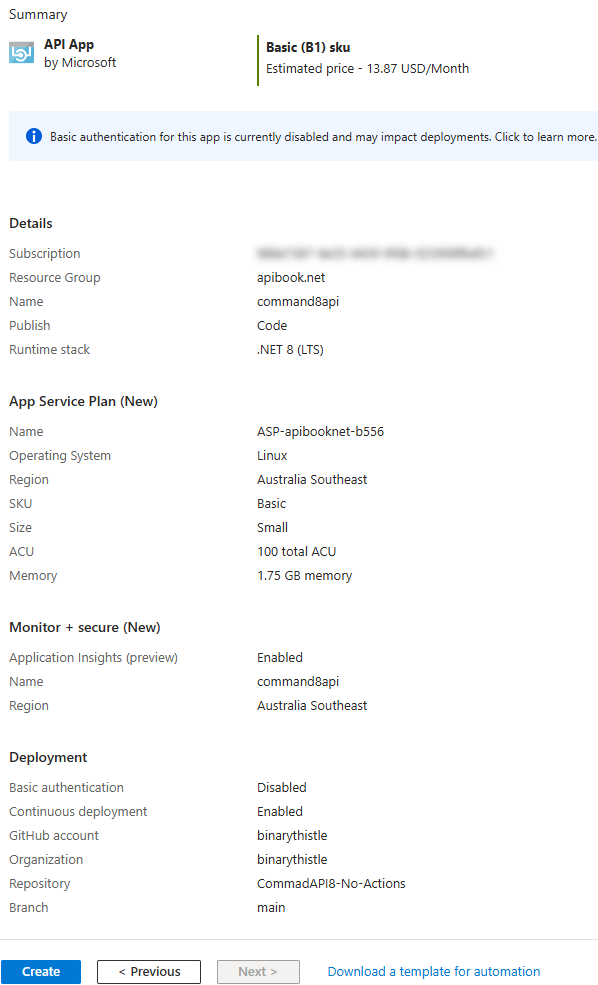
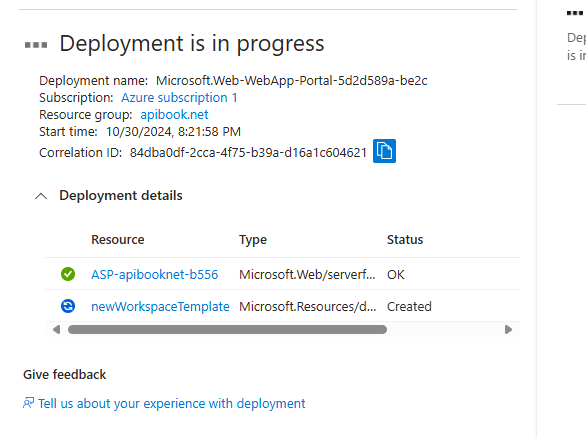
This will initiate the deployment in Azure
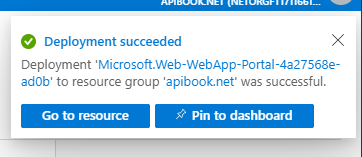
After a minute or two you should see the deployment has been successful:
GitHub Actions
In the Deployment step in the last section we elected to use GitHub Actions - but what are GitHub actions?
If we navigate back to our project on GitHub we’ll notice a new addition:
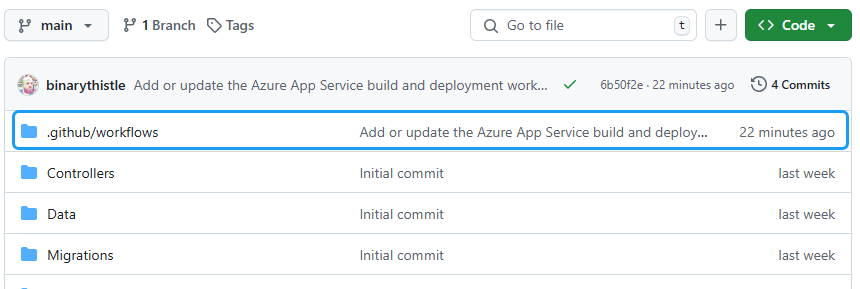
In this folder we will find a YAML file, in my case this is called: main_command8api.yml.
This file is essentially a set of automation steps that GitHub (Actions) will run every time code is pushed to our remote repository. In this case it (re)deploys our code to the Azure App Service we just created.
This file was created for us automatically by Azure. We’ll not be altering it in this chapter, but it goes without saying that you can tailor it to your needs.
CI/CD
The concept of deploying code every time code changes are made, is referred to generically as “CI/CD”, or : Continuous Integration / Continuous Delivery (or Deployment).
You can read about this practice further in the theory section, but it was essentially born out of the wider agile software delivery movement, where upfront realization of “value” is at the forefront of it’s thinking.
What this means for us in practice is that every time we add new features (or fix bugs) and push them to GitHub, this workflow will run and deploy our code. The value that our features have are realized in production for use.
This is what this whole iteration is building towards, so once we set this up and move through subsequent iterations, those changes will flow through to production.
But we’re not quite there yet, there is still some work to do…
Pulling changes
Before we move on, we’ll want to ensure that our local copy of our API code is in sync with the GitHub repository. From this statement, what you’ll now come to realize is that our local copy of the code is no longer the central point of reference - the GitHub copy is.
The code (the .yml file) that’s been committed to the GutHub repository (by Azure) is no different to code that may be pushed to that repository by our teammates. Therefore we should adopt the practice of refreshing the local copy of our code to ensure we have the latest changes.
Let’s do that now.
At a command prompt, ensure you are “in” the code project folder and type:
git branch
If you are not on main then:
git checkout main
Now that we have switched to our main branch we can pull our code:
git pull
This will retrieve the changes from GitHub and apply them locally, you should see output similar to the following:
remote: Enumerating objects: 6, done.
remote: Counting objects: 100% (6/6), done.
remote: Compressing objects: 100% (4/4), done.
remote: Total 5 (delta 1), reused 0 (delta 0), pack-reused 0 (from 0)
Unpacking objects: 100% (5/5), 1.16 KiB | 42.00 KiB/s, done.
From https://github.com/binarythistle/CommadAPI8-No-Actions
   15a9127..6b50f2e  main       -> origin/main
Updating 15a9127..6b50f2e
Fast-forward
 .github/workflows/main_command8apinew.yml | 65 +++++++++++++++++++++++++++++++
 1 file changed, 65 insertions(+)
 create mode 100644 .github/workflows/main_command8apinew.yml
Looking at VS Code (not shown) you should see that your project now has a .github folder (and the associated .yml file).
Build & Deploy Steps
Opening the .yml file, you should see something similar to the following:
# Docs for the Azure Web Apps Deploy action: https://github.com/Azure/webapps-deploy
# More GitHub Actions for Azure: https://github.com/Azure/actions

name: Build and deploy ASP.Net Core app to Azure Web App - commandapi8

on:
  push:
    branches:
      - main
  workflow_dispatch:

jobs:
  build:
    runs-on: ubuntu-latest

    steps:
      - uses: actions/checkout@v4

      - name: Set up .NET Core
        uses: actions/setup-dotnet@v4
        with:
          dotnet-version: '8.x'

      - name: Build with dotnet
        run: dotnet build --configuration Release

      - name: dotnet publish
        run: dotnet publish -c Release -o ${{env.DOTNET_ROOT}}/myapp

      - name: Upload artifact for deployment job
        uses: actions/upload-artifact@v4
        with:
          name: .net-app
          path: ${{env.DOTNET_ROOT}}/myapp

  deploy:
    runs-on: ubuntu-latest
    needs: build
    environment:
      name: 'Production'
      url: ${{ steps.deploy-to-webapp.outputs.webapp-url }}
    permissions:
      id-token: write #This is required for requesting the JWT

    steps:
      - name: Download artifact from build job
        uses: actions/download-artifact@v4
        with:
          name: .net-app

      - name: Login to Azure
        uses: azure/login@v2
        with:
          client-id: ${{ secrets.AZUREAPPSERVICE_CLIENTID_CE4E44EF636D41FD9F8AD13AD7B91A17 }}
          tenant-id: ${{ secrets.AZUREAPPSERVICE_TENANTID_7E50AD70B6F14E61A3D92650795E3F92 }}
          subscription-id: ${{ secrets.AZUREAPPSERVICE_SUBSCRIPTIONID_A367C62574E3415685BF019E29236BCC }}

      - name: Deploy to Azure Web App
        id: deploy-to-webapp
        uses: azure/webapps-deploy@v3
        with:
          app-name: 'commandapi8'
          slot-name: 'Production'
          package: .
I’m not going to go through each line in detail, but at a high level it does the following:
- Triggers when code is pushed to the main branch
- Runs a
buildjob that:- Checks out the code
- Sets up a .NET 8 environment for building
- Runs
dotnet build - Runs
dotnet publishto create a build artifact - Uploads that artifact for deployment
- Runs a
deployjob that:- Specifies the environment for deployment
- Gets the build artifact from the prior step
- Logs in to Azure (using secrets that are configured in GitHub)
- Deploys our artifact
This aligns to CI/CD in the following way:
- CI =
buildjob - CD =
deployjob
Where's the testing?
One thing you’ll notice here is that we are not running any automated tests. This is because we don’t have any yet! We’ll revisit this omission in later iterations.Create PostgreSQL Instance
In this section we’ll be working with Azure again, but this time we’ll be working with the Azure CLI.
Azure CLI is a recommended dependency from Iteration 0.
Why an Azure Container Registry?
The outcome of this section is to run an instance of PostgreSQL in something called an Azure Container Instance - this is essentially just running a Docker container on Azure.
When we ran a container locally using Docker Desktop, we specified the image that we wanted (postgres:latest) in our Docker Compose file - and this worked great.
However, at the time of writing, Docker Hub is not permitting Azure to pull images directly from it (this occurs when we spin up our Azure Container Instance). The rational Docker Hub have given for this restriction centers round the number of anonymous request they’d need to service from Azure.
This restriction means that we cannot easily (i.e. using the Azure Portal) successfully set up Container Instances.
There are a few different ways to navigate this, one of them is to authenticate to Docker Hub as a specific user. The method I’ve elected to use is to host our own container (aka image) registry that we can pull directly from - hence the need to create an Azure Container Registry.
Create a Container Registry
Login to Azure using the Azure CLI by typing:
az login
We’ll use the same resource group that we’ve used previously in this section.
Create the ACR
az acr create --resource-group apibook.net --name commanderacr --sku Basic --location "australiasoutheast"
NOTE: Replace the
--locationwith whatever locale you are using.
If successful, you’ll get a JSON payload response detailing the ACR.
Set admin-enabled to true
az acr update --name commanderacr --admin-enabled true
Make sure that in the JSON response you see the following:
"adminUserEnabled": true
Get the login credentials for the ACR:
az acr credential show --name commanderacr
This will return something similar to the following:
{
  "passwords": [
    {
      "name": "password",
      "value": "<REDACTED>"
    },
    {
      "name": "password2",
      "value": "REDACTED"
    }
  ],
  "username": "commanderacr"
}
Put aside the username and password (in a secure location in preparation for the next step)
IMPORTANT Ensure that Docker is running locally before attempting the next step
Next we’ll check that we have the latest version of the postgres image on our local machine:
docker pull postgres:latest
If a new version is required this may take a minute or so.
Once the image has been downloaded we are going to tag it with out ACR, (ensure that you replace your registry name as appropriate):
docker tag postgres:latest commanderacr.azurecr.io/postgres:latest
Next we’ll login to the ACR from the CLI (ensure that Docker is still running at this point):
az acr login --name commanderacr
Enter the username and password obtained in the section above.
We’ll now push the postges image up to our ACR:
docker push commanderacr.azurecr.io/postgres:latest
You should see the image being pushed up to Azure:
lesja ~> docker push commanderacr.azurecr.io/postgres:latest
The push refers to repository [commanderacr.azurecr.io/postgres]
a7e4c23b4cff: Pushed
22b712b08f69: Pushed
b4afa05fc275: Pushed
8690ec8b7636: Pushed
5b98708a3c81: Pushed
198c34bae69f: Pushing [=>                                                 ]  12.12MB/317MB
bdca379f8f8f: Pushed
d682763b036f: Pushed
d809413e4c84: Pushed
e769174636eb: Pushing [================================>                  ]  16.54MB/25.19MB
dbdfaa7cdcc9: Pushed
1fcc8027fd1d: Pushing [==================================================>]  10.15MB
98376b4b3727: Pushed
c3548211b826: Pushing [======>                                            ]  10.29MB/74.78MB
When it’s complete we can list the images in our ACR as follows:
az acr repository list --name commanderacr --output table
You should see something similar to the following:
Result
--------
postgres
Configure a Postgres Container Instance
NOTE: There is a LOT of room for error in this command, so ensure that you double check the name being used for the ACR, and well as the value for
dns-name-label.
az container create --resource-group apibook.net --name postgresql --image commanderacr.azurecr.io/postgres:latest --registry-login-server commanderacr.azurecr.io --registry-username commanderacr --registry-password <REDACTED> --cpu 1 --memory 1.5 --ports 5432 --environment-variables POSTGRES_USER=cmddbuser POSTGRES_PASSWORD=Pa55w0rd? POSTGRES_DB=commands --location australiasoutheast --ip-address public --dns-name-label commanderapipgdb
If successful you should get a JSON payload response detailing the container instance config. Make a note of the fdqn value as we’ll be needing this later.
We should check the status of the container instance before moving on to make sure it is in the Running state. To do so type the following:
az container show --resource-group apibook.net --name postgresql --query "instanceView.state" --output tsv
This should return a value of: Running.
Test the connection
We are going to follow the same steps as shown here in Iteration 1 so I’m not going to detail them again here. The only differences are:
- The value you provide for Host, instead of
localhostthis will be thefdqnvalue of our container instance. - I’ve heightened the password complexity a little so this value is different
Assuming all is well you should see:
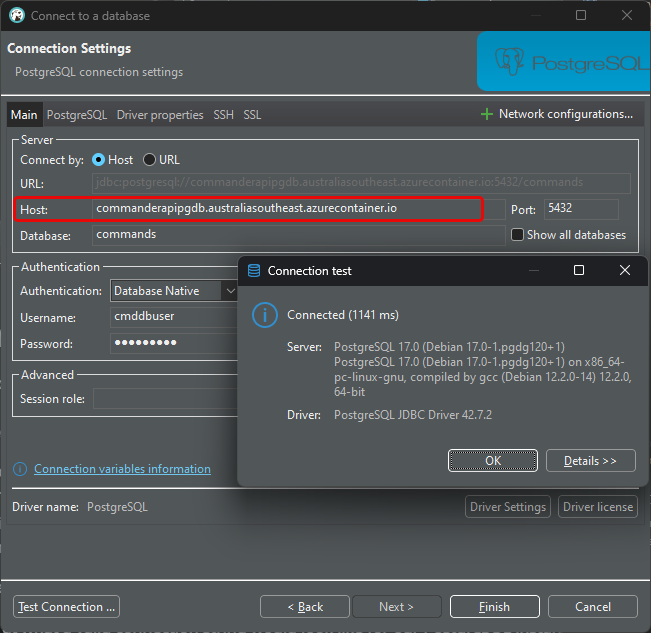
Our instance of Postgres is now ready for us to use.
Just be clear that we’ve really just created the Postges instance and the
commandsdatabase, the schema for our API is still not there. We deal with this at the end of this iteration.
Configure the App Service
There is 1 last thing we need to do from set up perspective on our API App Service, and that is provide configuration values.
In Iteration 1, specifically the section on .NET Configuration, we discussed the following configuration sources:
- appSettings.json: Used for non-sensitive config
- User Secrets: Used for sensitive config
In both cases these sources are ok for a development environment, but not for a production environment like Azure, so we need to configure that - in Azure.
As a reminder we have the following config elements:
PostgreSqlConncetion: This contained the non-sensitive aspects of the connection stringDbUserId: This contained the user name of the PostgreSQL DB userDbPassword: This contained the password of the PostgreSQL DB user
We will create these same configuration elements directly in Azure so that our app code (running in Azure) will pick them up. Remembering that the .NET Configuration API provides a layer of abstraction over the actual config sources (e.g. User Secrets, App Settings etc.), meaning that running app does not care where they come from, so long as they are there!
Connection String
Back in the Azure Portal, go back to the home page, and select “All resources”:
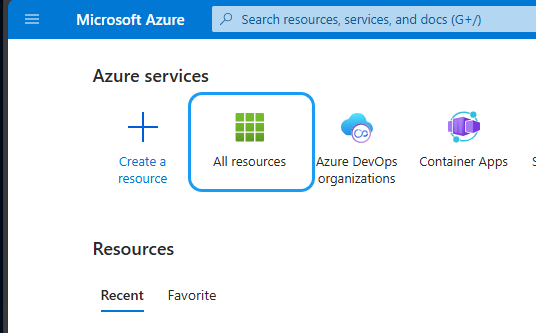
Then find your API App Service and select it:

Select:
- Settings
- Environment Variables
- Connection Strings
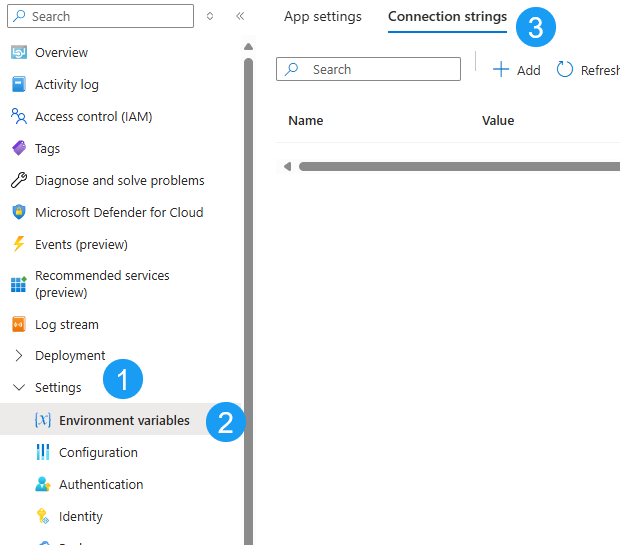
Select “+ Add”, and populate the fields as follows:
- Name:
PostgreSqlConncetion- the exact same as our local connection string element - Value:
Host=commanderapipgdb.australiasoutheast.azurecontainer.io;Port=5432;Database=commands;Pooling=true; - Type:
Custom
NOTE: There is a specific value of
PostgreSQLin the Type drop-down, but I’ve had issues with this in the past so tend to stick withCustom. Feel free to experiment and let me know how you go!

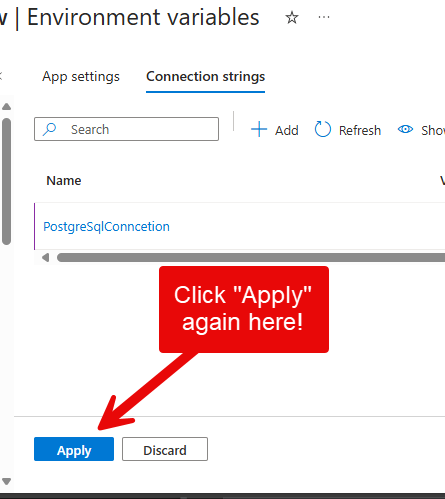
When you’re happy select “Apply”, you will be returned to the Environment Variables view, then ensure you select “Apply” again!:
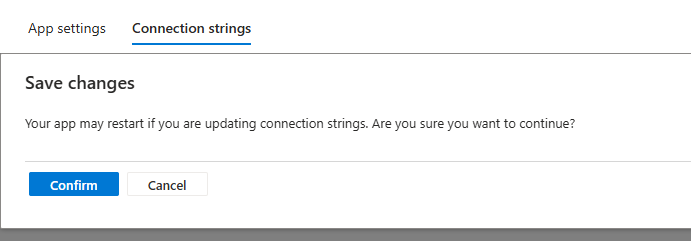
And then select “Confirm” - this will restart the app service:
App settings
Finally in this section we’re going to add the database username, password and environment to the “App settings” section of “Environment Variables”.
- Select: “App settings”
- Click “+ Add”
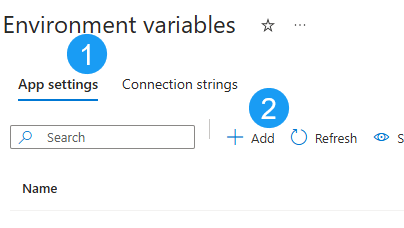
In the next screed we’ll add the value fo the username, so:
- Name:
DbUserId - Value:
cmddbuser
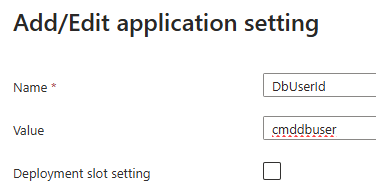
Click “Apply”, this will return you to the “Environment Variables” screen, where you can repeat these steps to add our password with the following values:
- Name:
DbPassword - Value:
Pa55w0rd?
NOTE: While the Name value is identical to our development environment (it kind of needs to be!), I have heightened the password complexity a little bit for Production. You may have picked up in this when I created the Postgres Container instance.
Finally we’re going to specify that the environment is Production by adding the following app setting:
- Name:
Environment - Value:
Production
Having added our 3 App Settings, you now need to click apply:
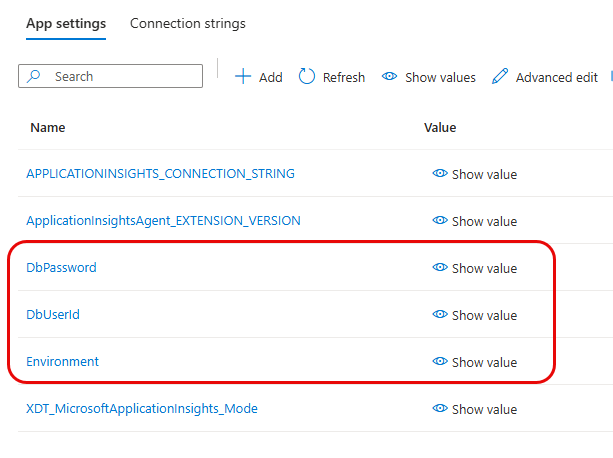
And as before you’ll need to confirm:

Deploy Code
Back in our program.cs file add the following lines in the location specified:
.
.
.
var app = builder.Build();

// ******* NEW CODE *******
using (var scope = app.Services.CreateScope())
{
    var dbContext = scope.ServiceProvider.GetRequiredService<AppDbContext>();
    dbContext.Database.Migrate(); // Applies pending migrations
}
// **** END OF NEW CODE ***

app.UseHttpsRedirection();
.
.
.
Feature branch?
For the keen of eye, you’ll notice that we’re just making code changes without creating a “Feature Branch” in Git. Should we? Technically, I’d say yes, but since this has been a very long chapter I’m just going to commit directly tomain.
If you like you can of course create a feature branch for these changes!
Save your changes, then stage them in git as follows:
git add .
Commit those changes with a message:
git commit -m "feat: add auto-run migrations"
Push the changes up to GitHub - and get ready for the magic of CI/CD!
git push origin main
If we move over to the remote repository on GitHub, and select the “Actions” tab, you should see our CI/CD pipeline in action:
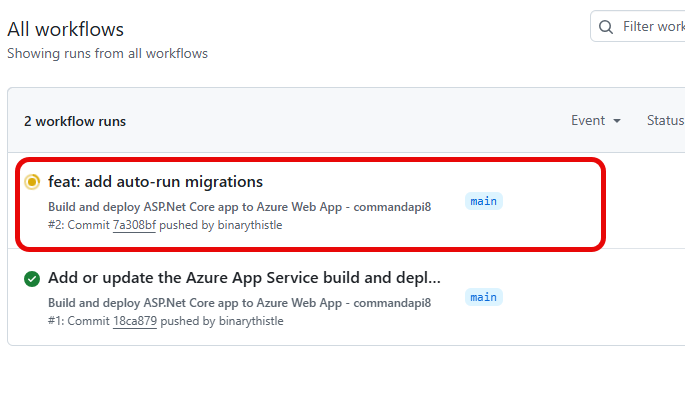
All things being equal, we should end up with a green deploy:

Testing
Although we’ve restarted the app service when we applied our environment variables in the last section - I always like to do this again.
In the Azure Portal:
- Select Overview
- Restart
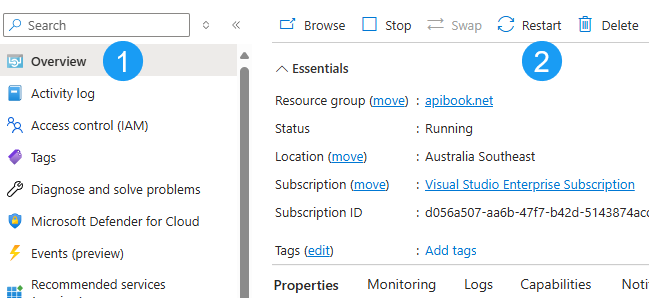
While in the Overview section, make note of the Default Domain for the service as we’ll need this when making a test call.
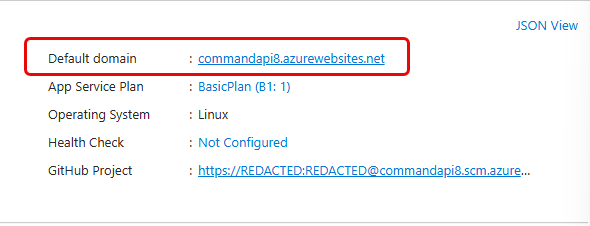
Back in Insomnia duplicate one of the test requests we used for our local development instance, and replace localhost with the default domain address:
TIP: I’ll tend to create a separate folders in Insomnia to organize my local and Azure based requests.
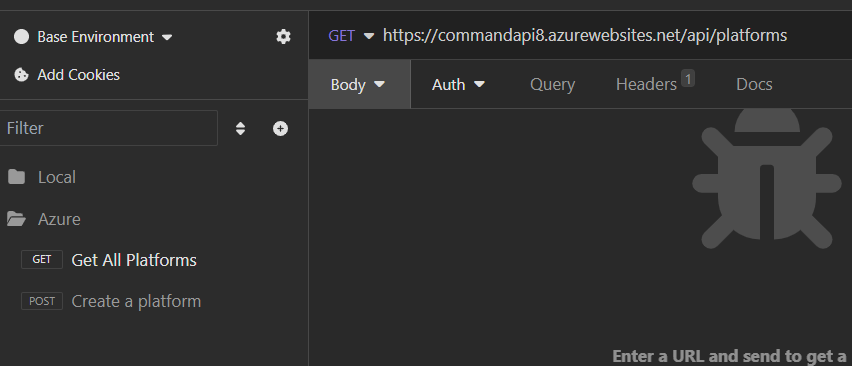
You should get a response from the API (you will of course need to create resources on here).
Points to consider
- The first time you make a request to the API it may take some time, subsequent requests should be sub 1 second
- If you restart the Container Instance running PostgreSQL, then the data (and schema) will be wiped
- I have added an item to the backlog to cover the remediation of this